ChatGPT / Codex Setup Guide
On this page
Before You Start
1. Install ChatGPT / Codex
Open the ChatGPT / Codex download page.
2. Register and Sign In to Genius Coder
Create an account. After signing in, your account has a small default balance for testing. You can top up after the setup test succeeds.
3. Create an API Key
Click “API Keys” in the left menu, or open the API Keys page directly. On the API Keys page, click the create key button.
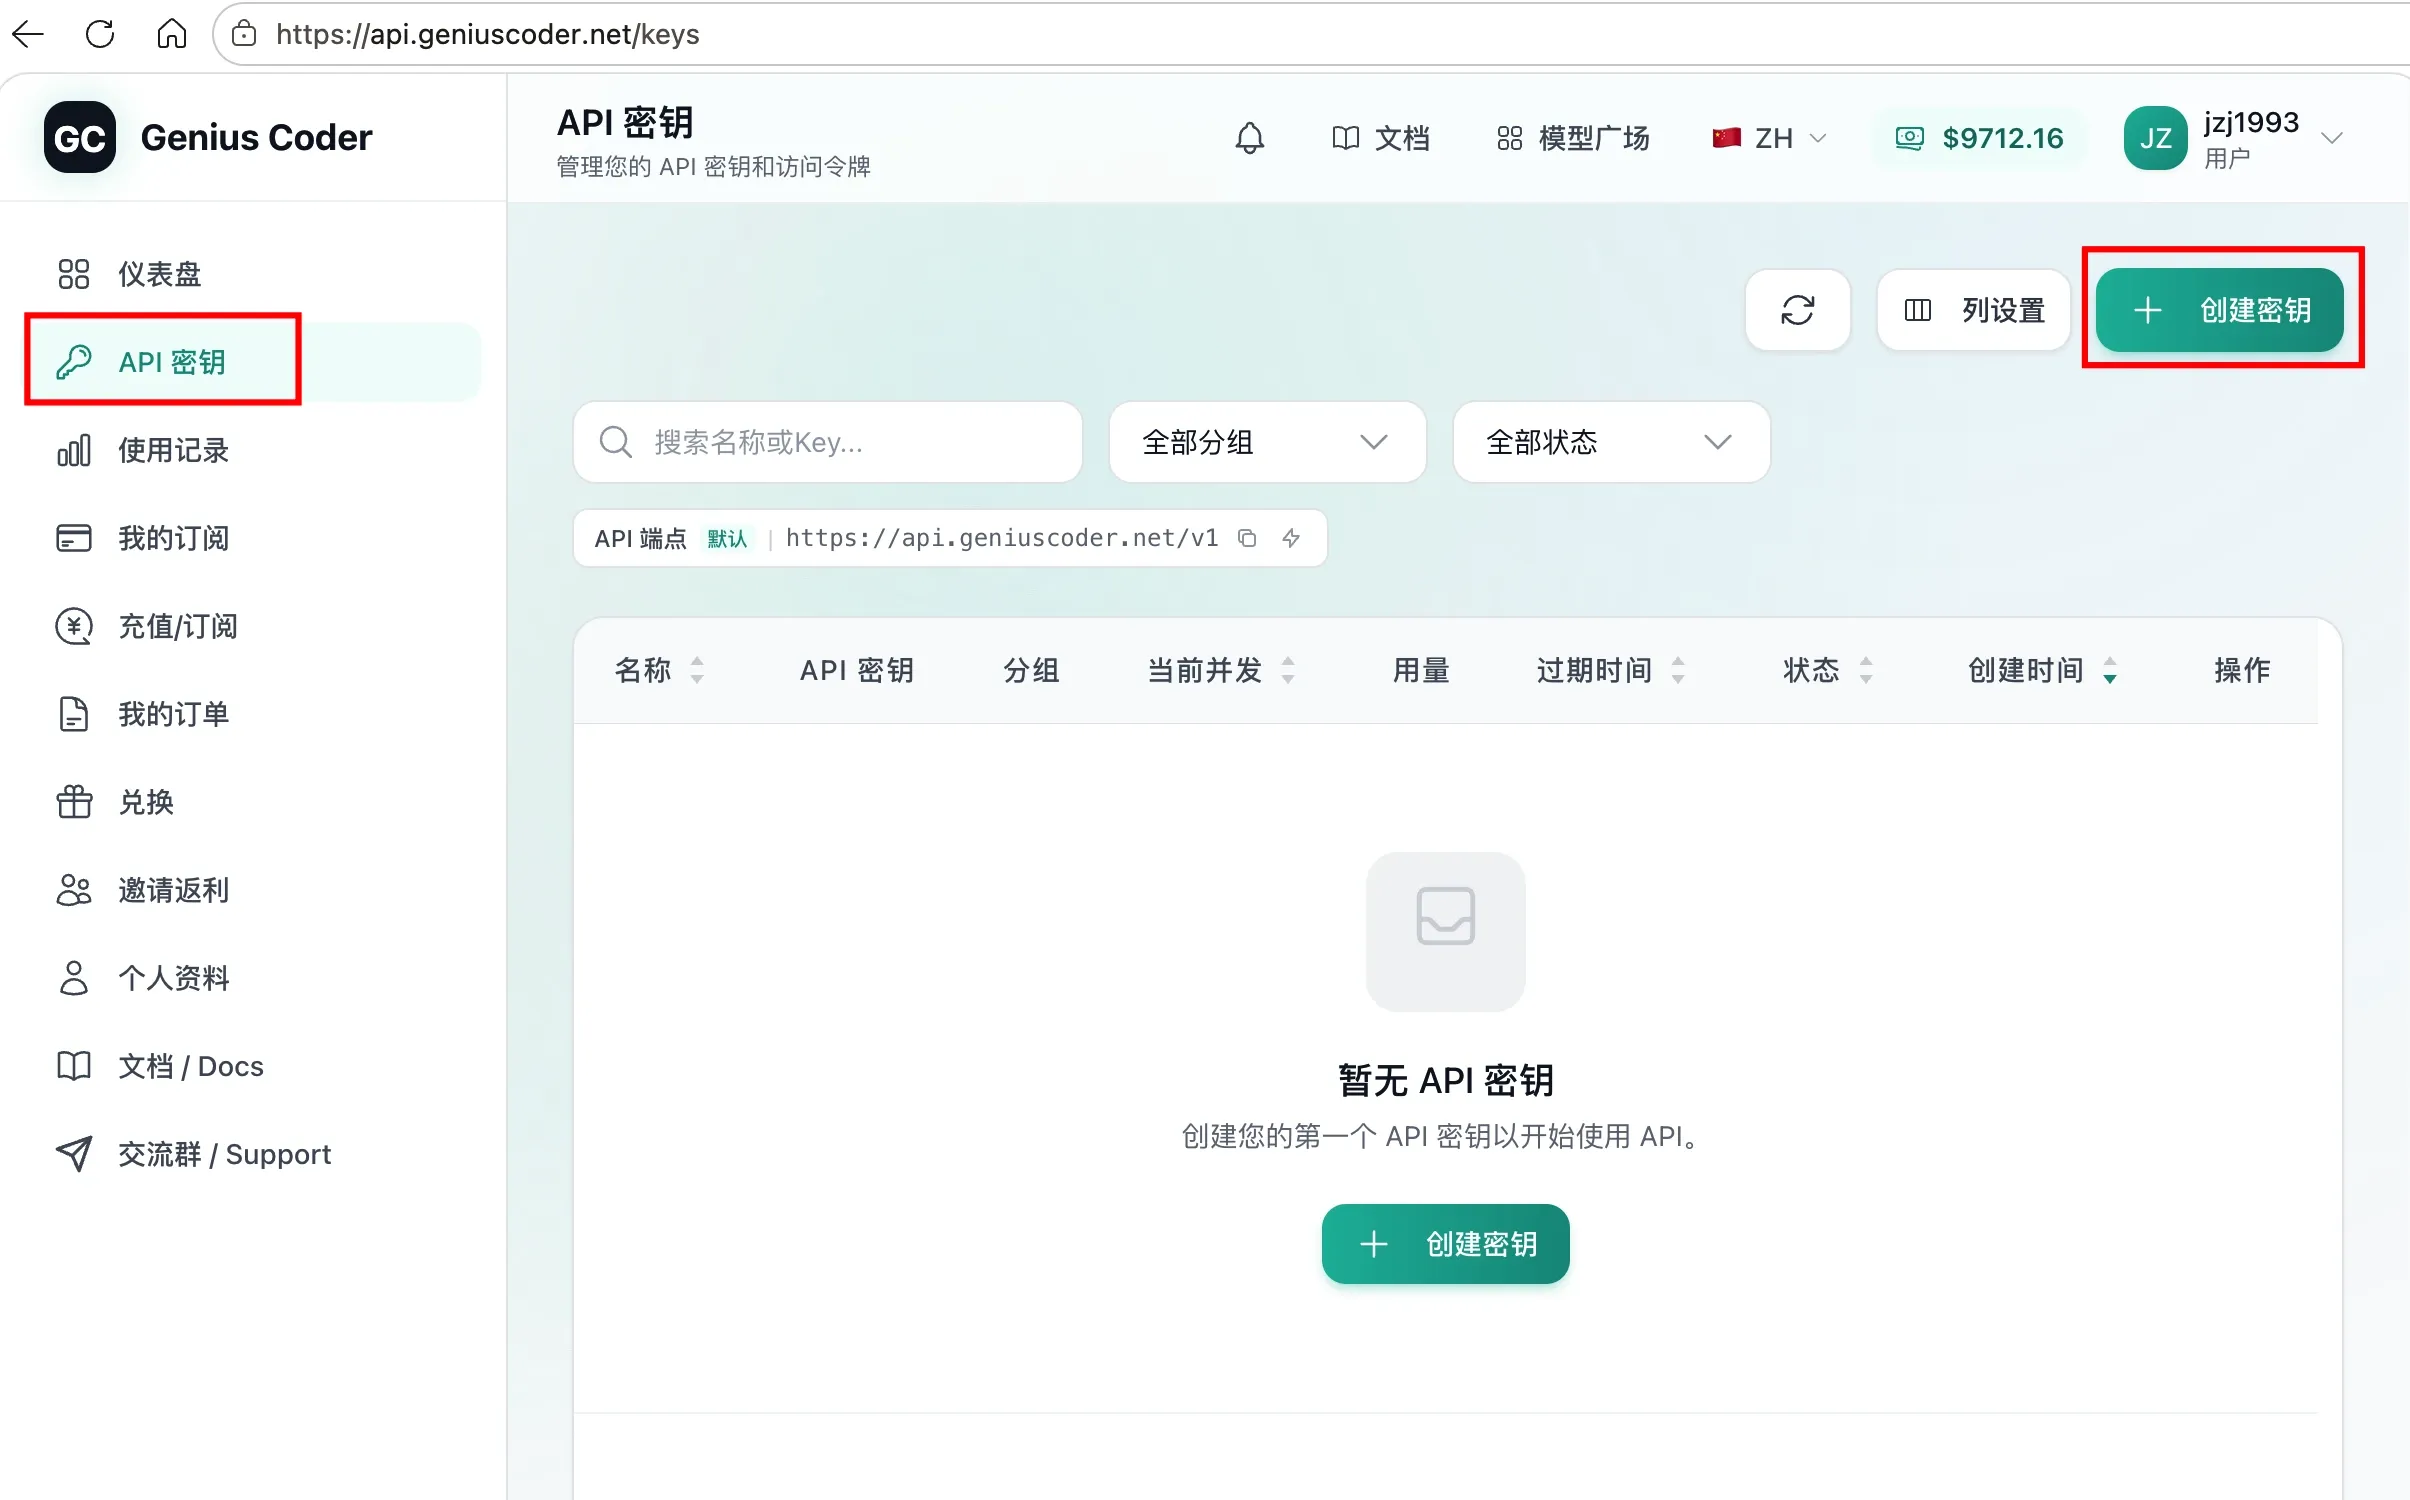
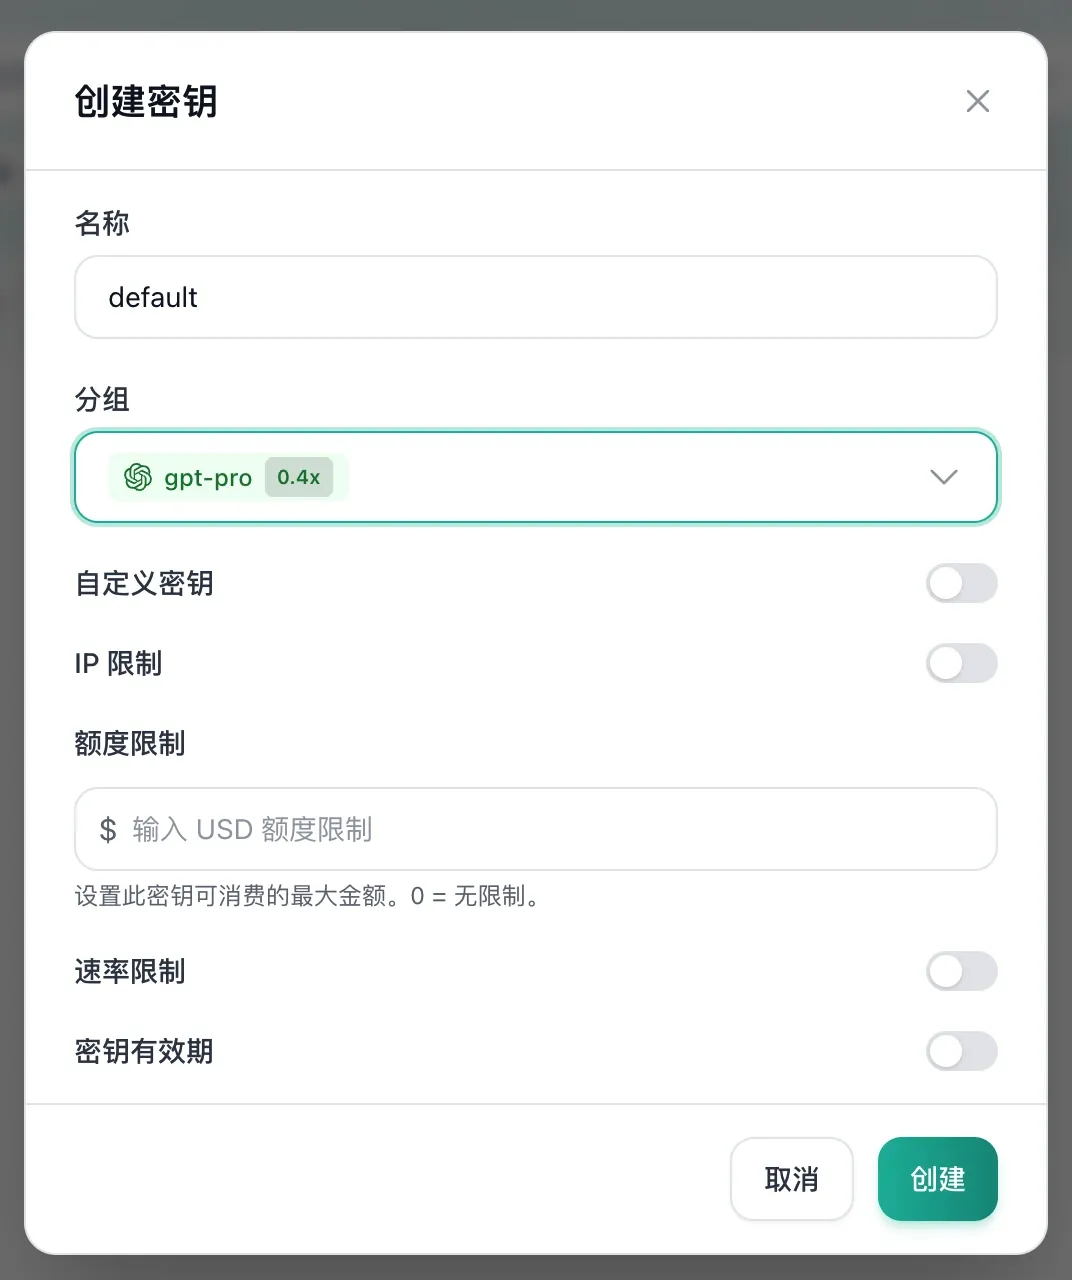
Enter a custom key name, choose the group you want to use, and click the create button. Different groups may have different billing multipliers and stability levels.
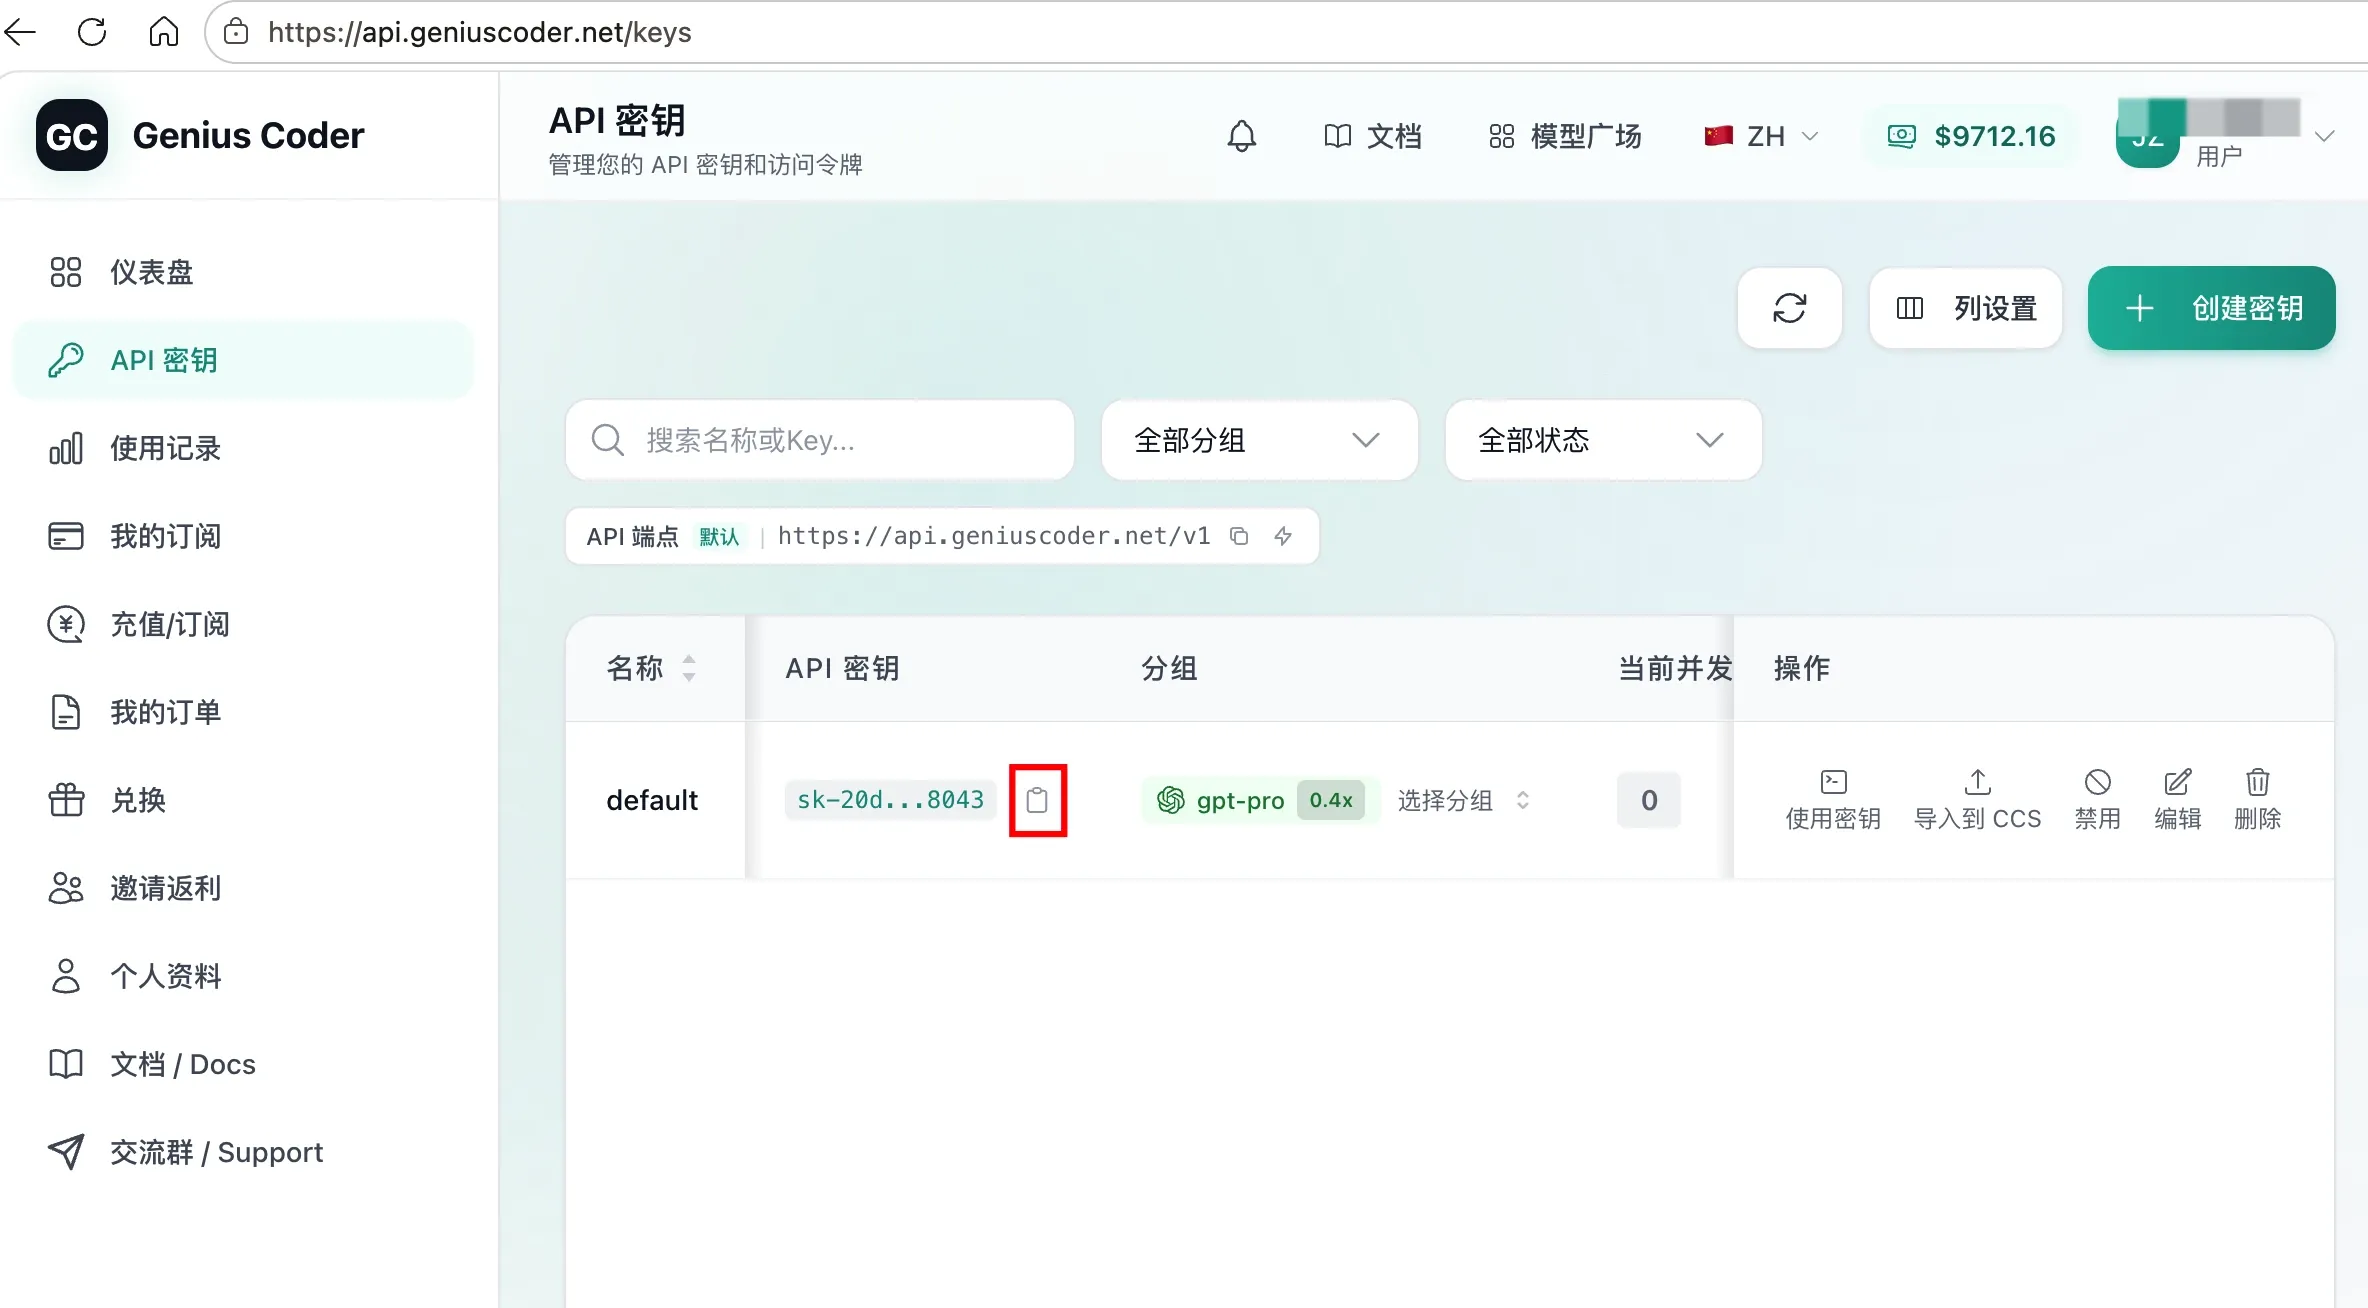
After the key is created, click the copy button on the right side of the key to copy it to your clipboard. The default format is sk-xxx.
Note: Do not share your API Key. Anyone who has it can use the balance in your account.
Option 1: Import to ChatGPT / Codex with CC Switch
1. Download and Install CC Switch
Install CC Switch.
2. Import the API Key to CC Switch
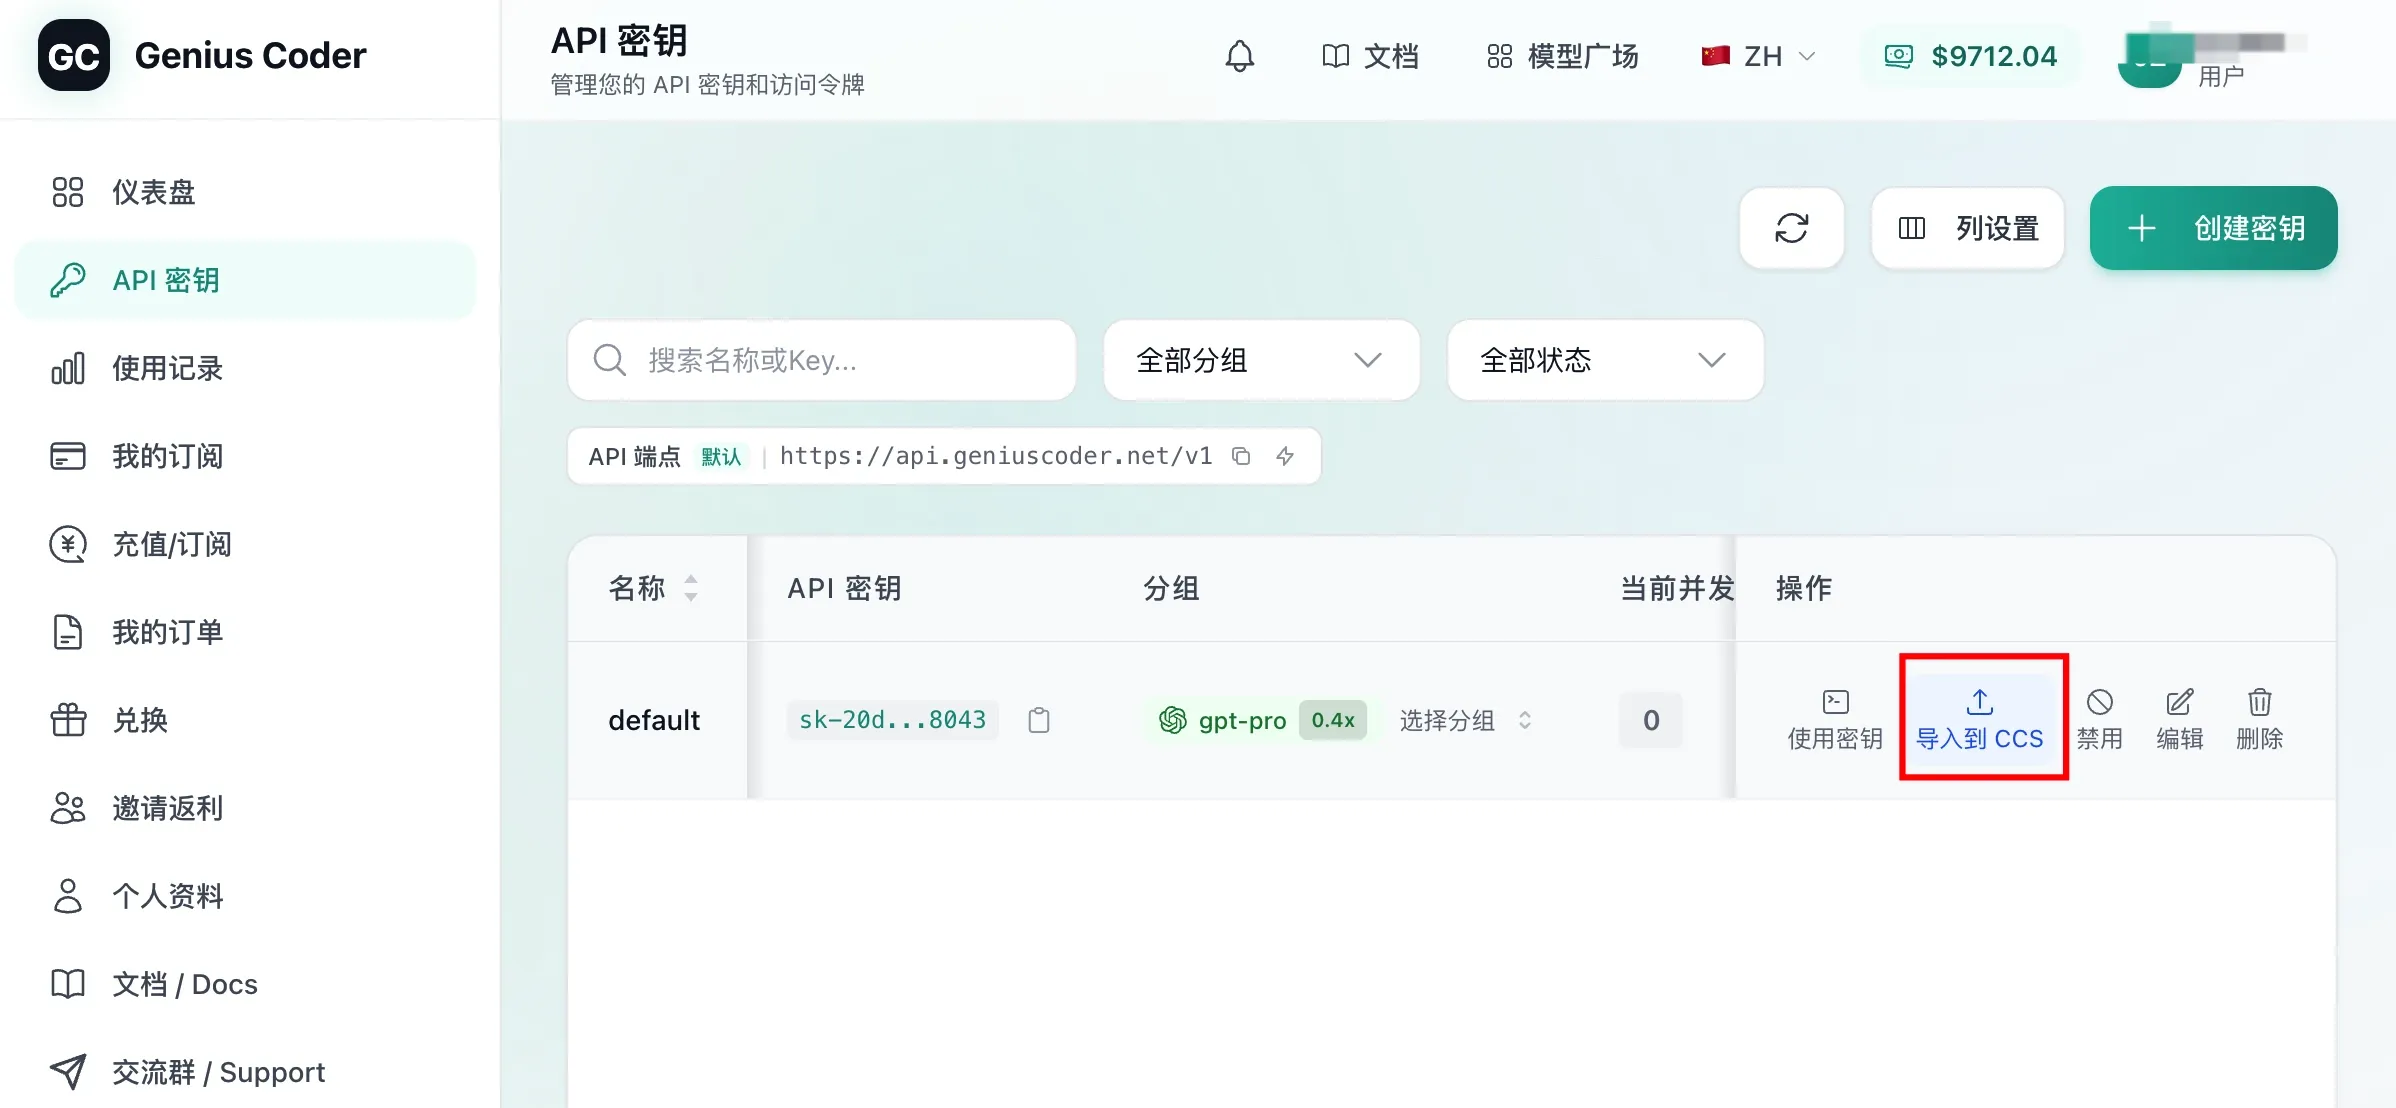
On the API Keys page, click the “Import to CCS” button on the right.
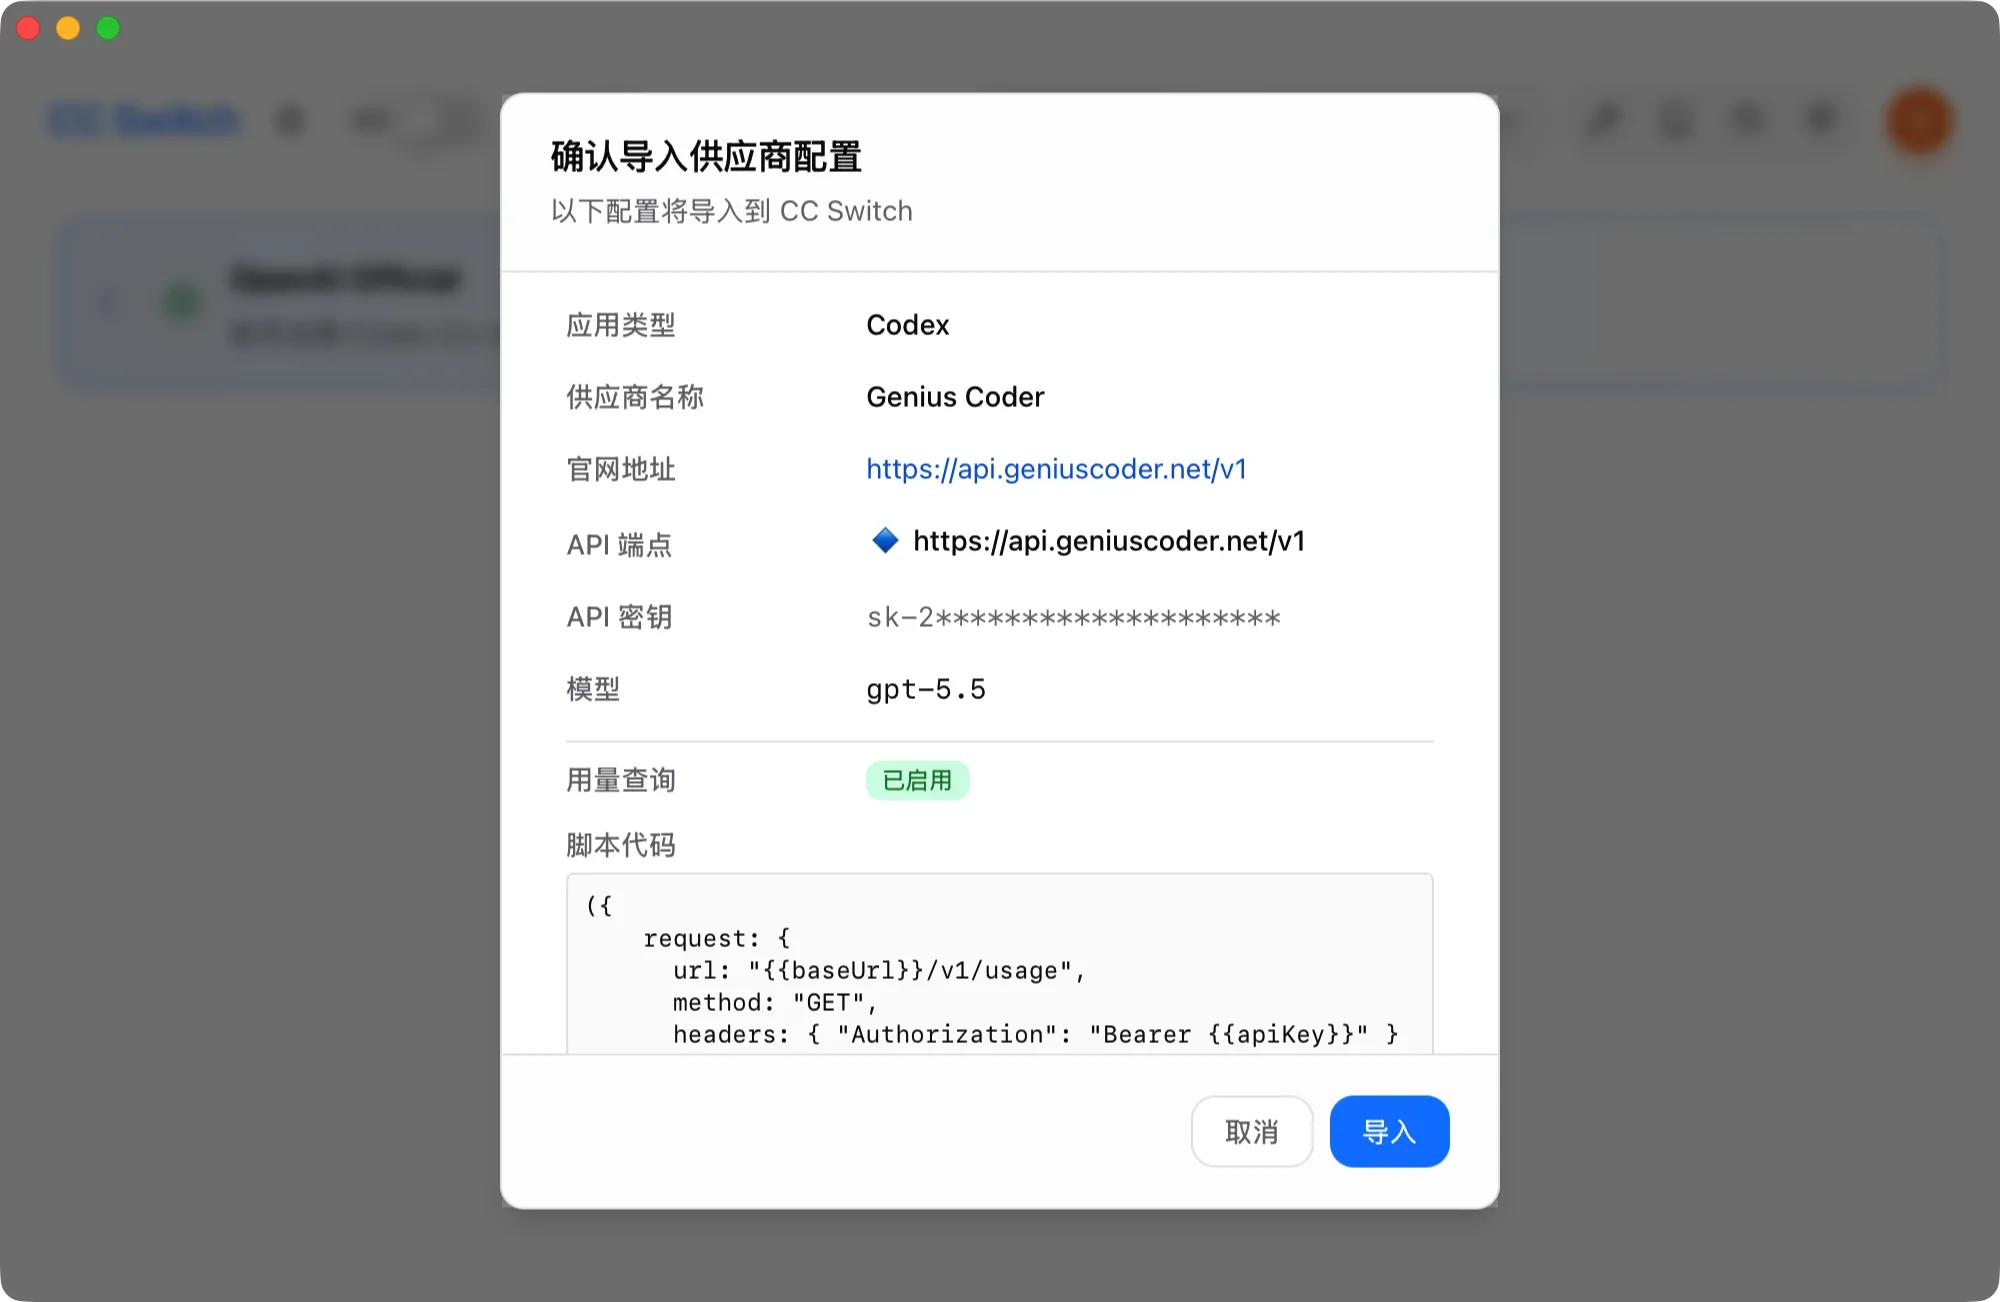
After clicking import, CC Switch opens and shows the prompt in the screenshot. Click confirm.
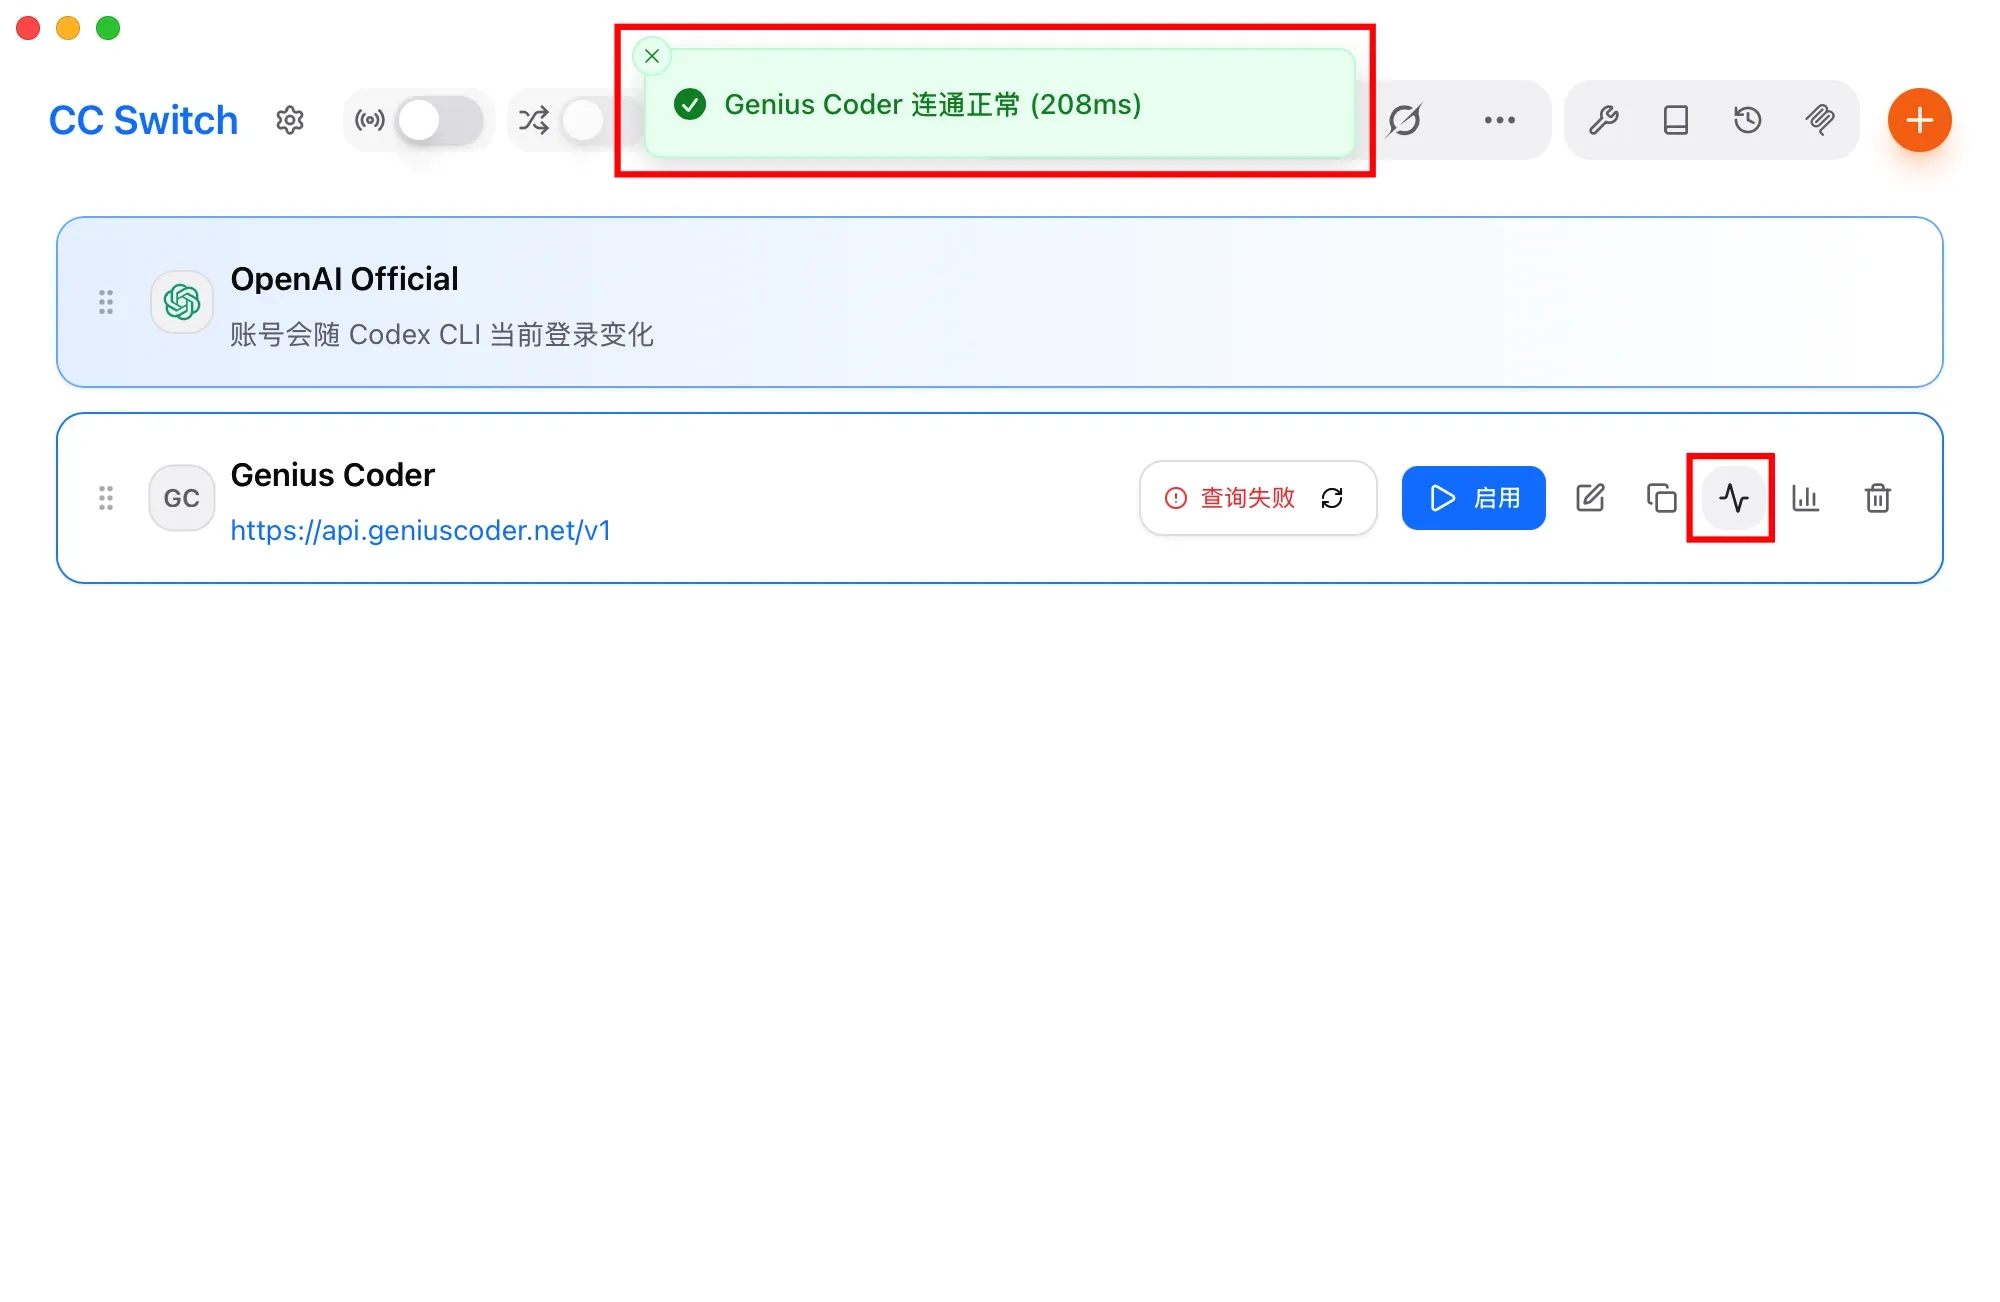
Click the test button. If the test succeeds, the API Key was imported into CC Switch and can be used normally.
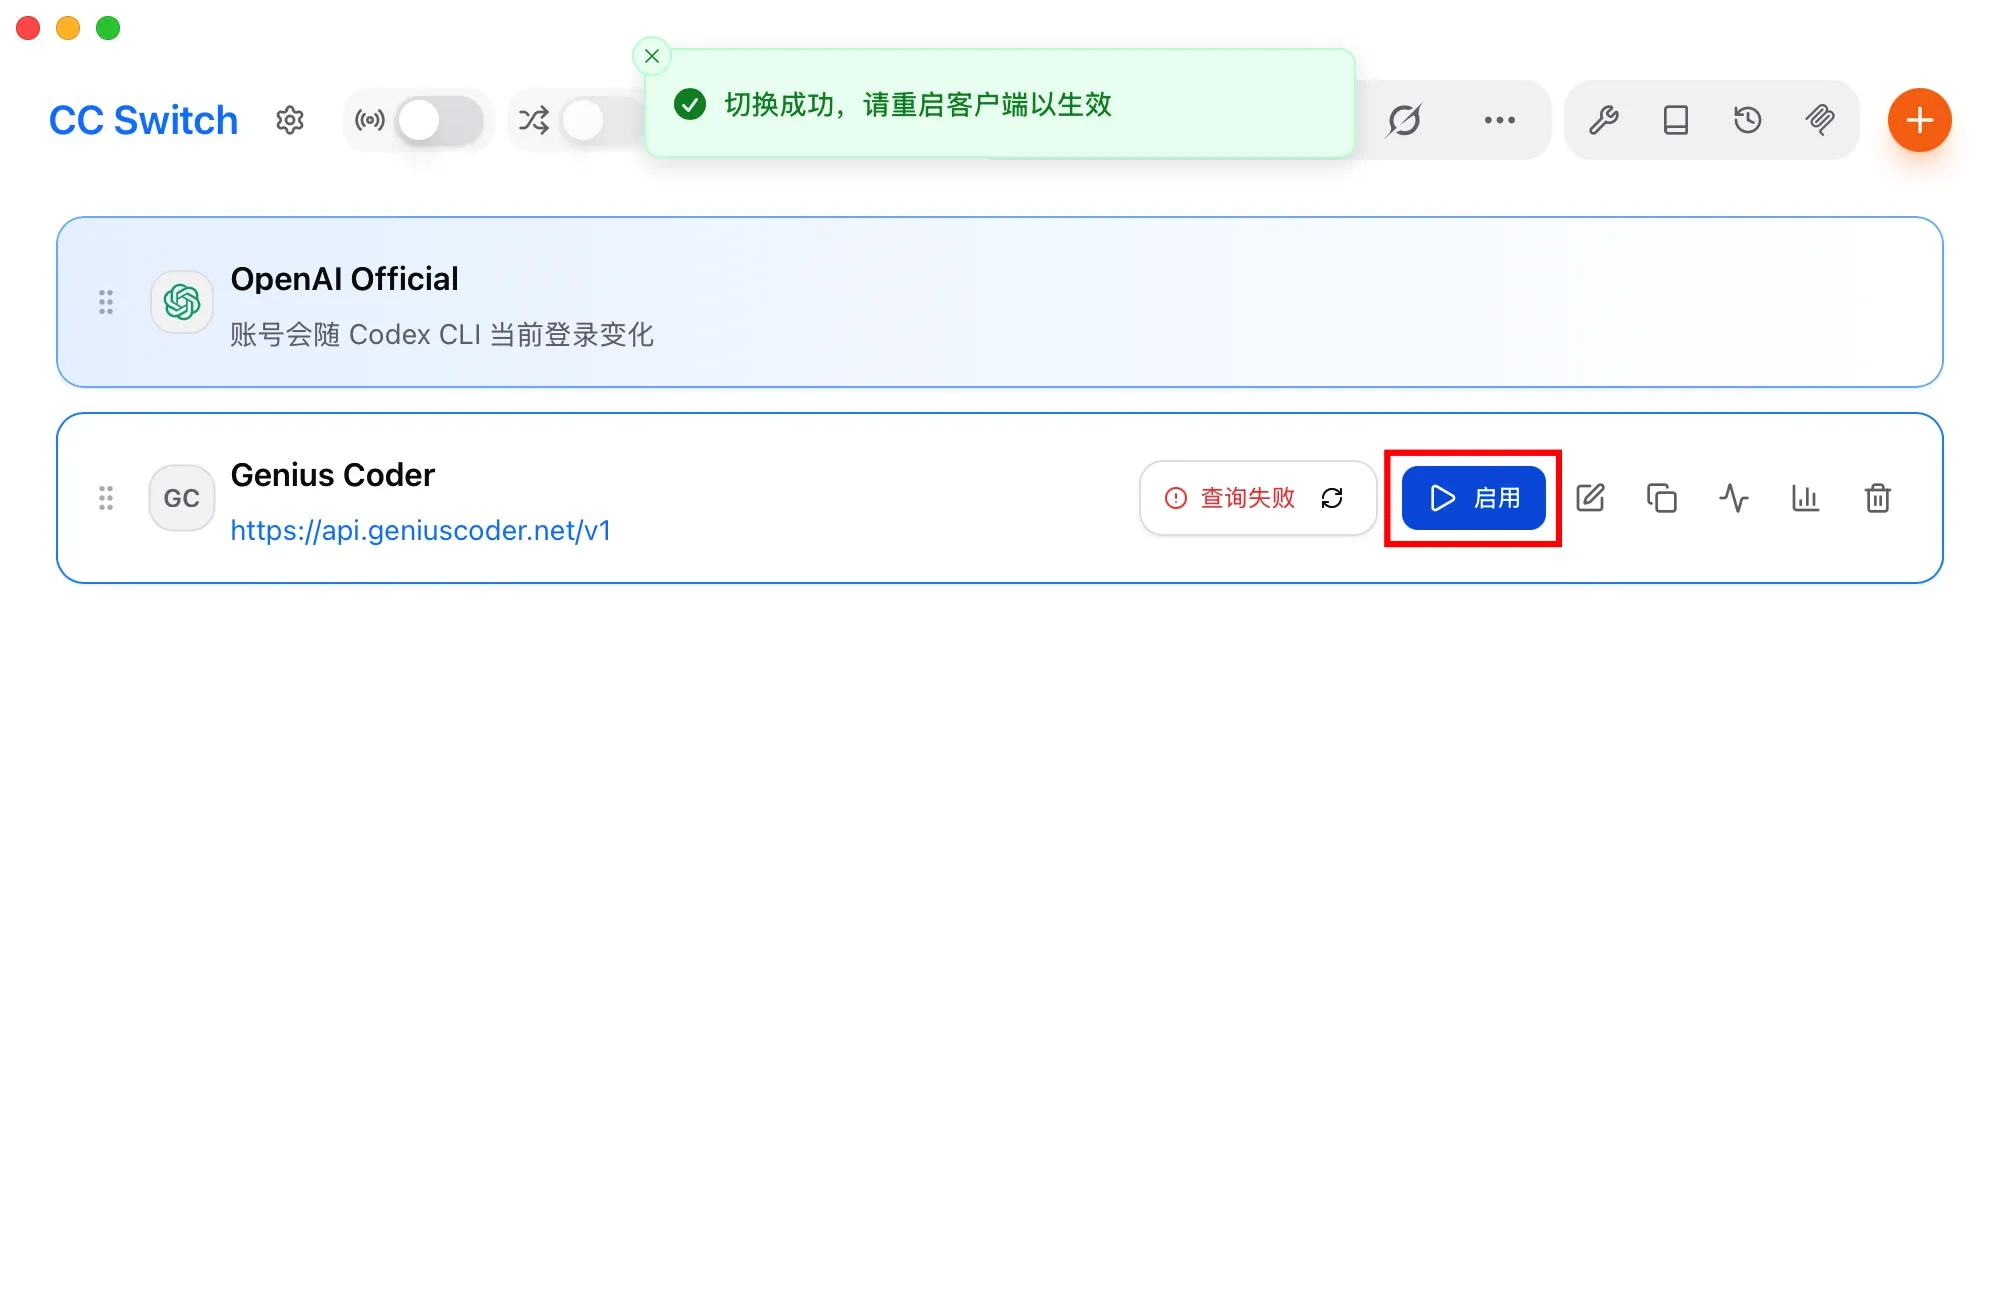
3. Import from CC Switch to ChatGPT / Codex
Click the enable button for this account. CC Switch will automatically configure the account for ChatGPT / Codex.
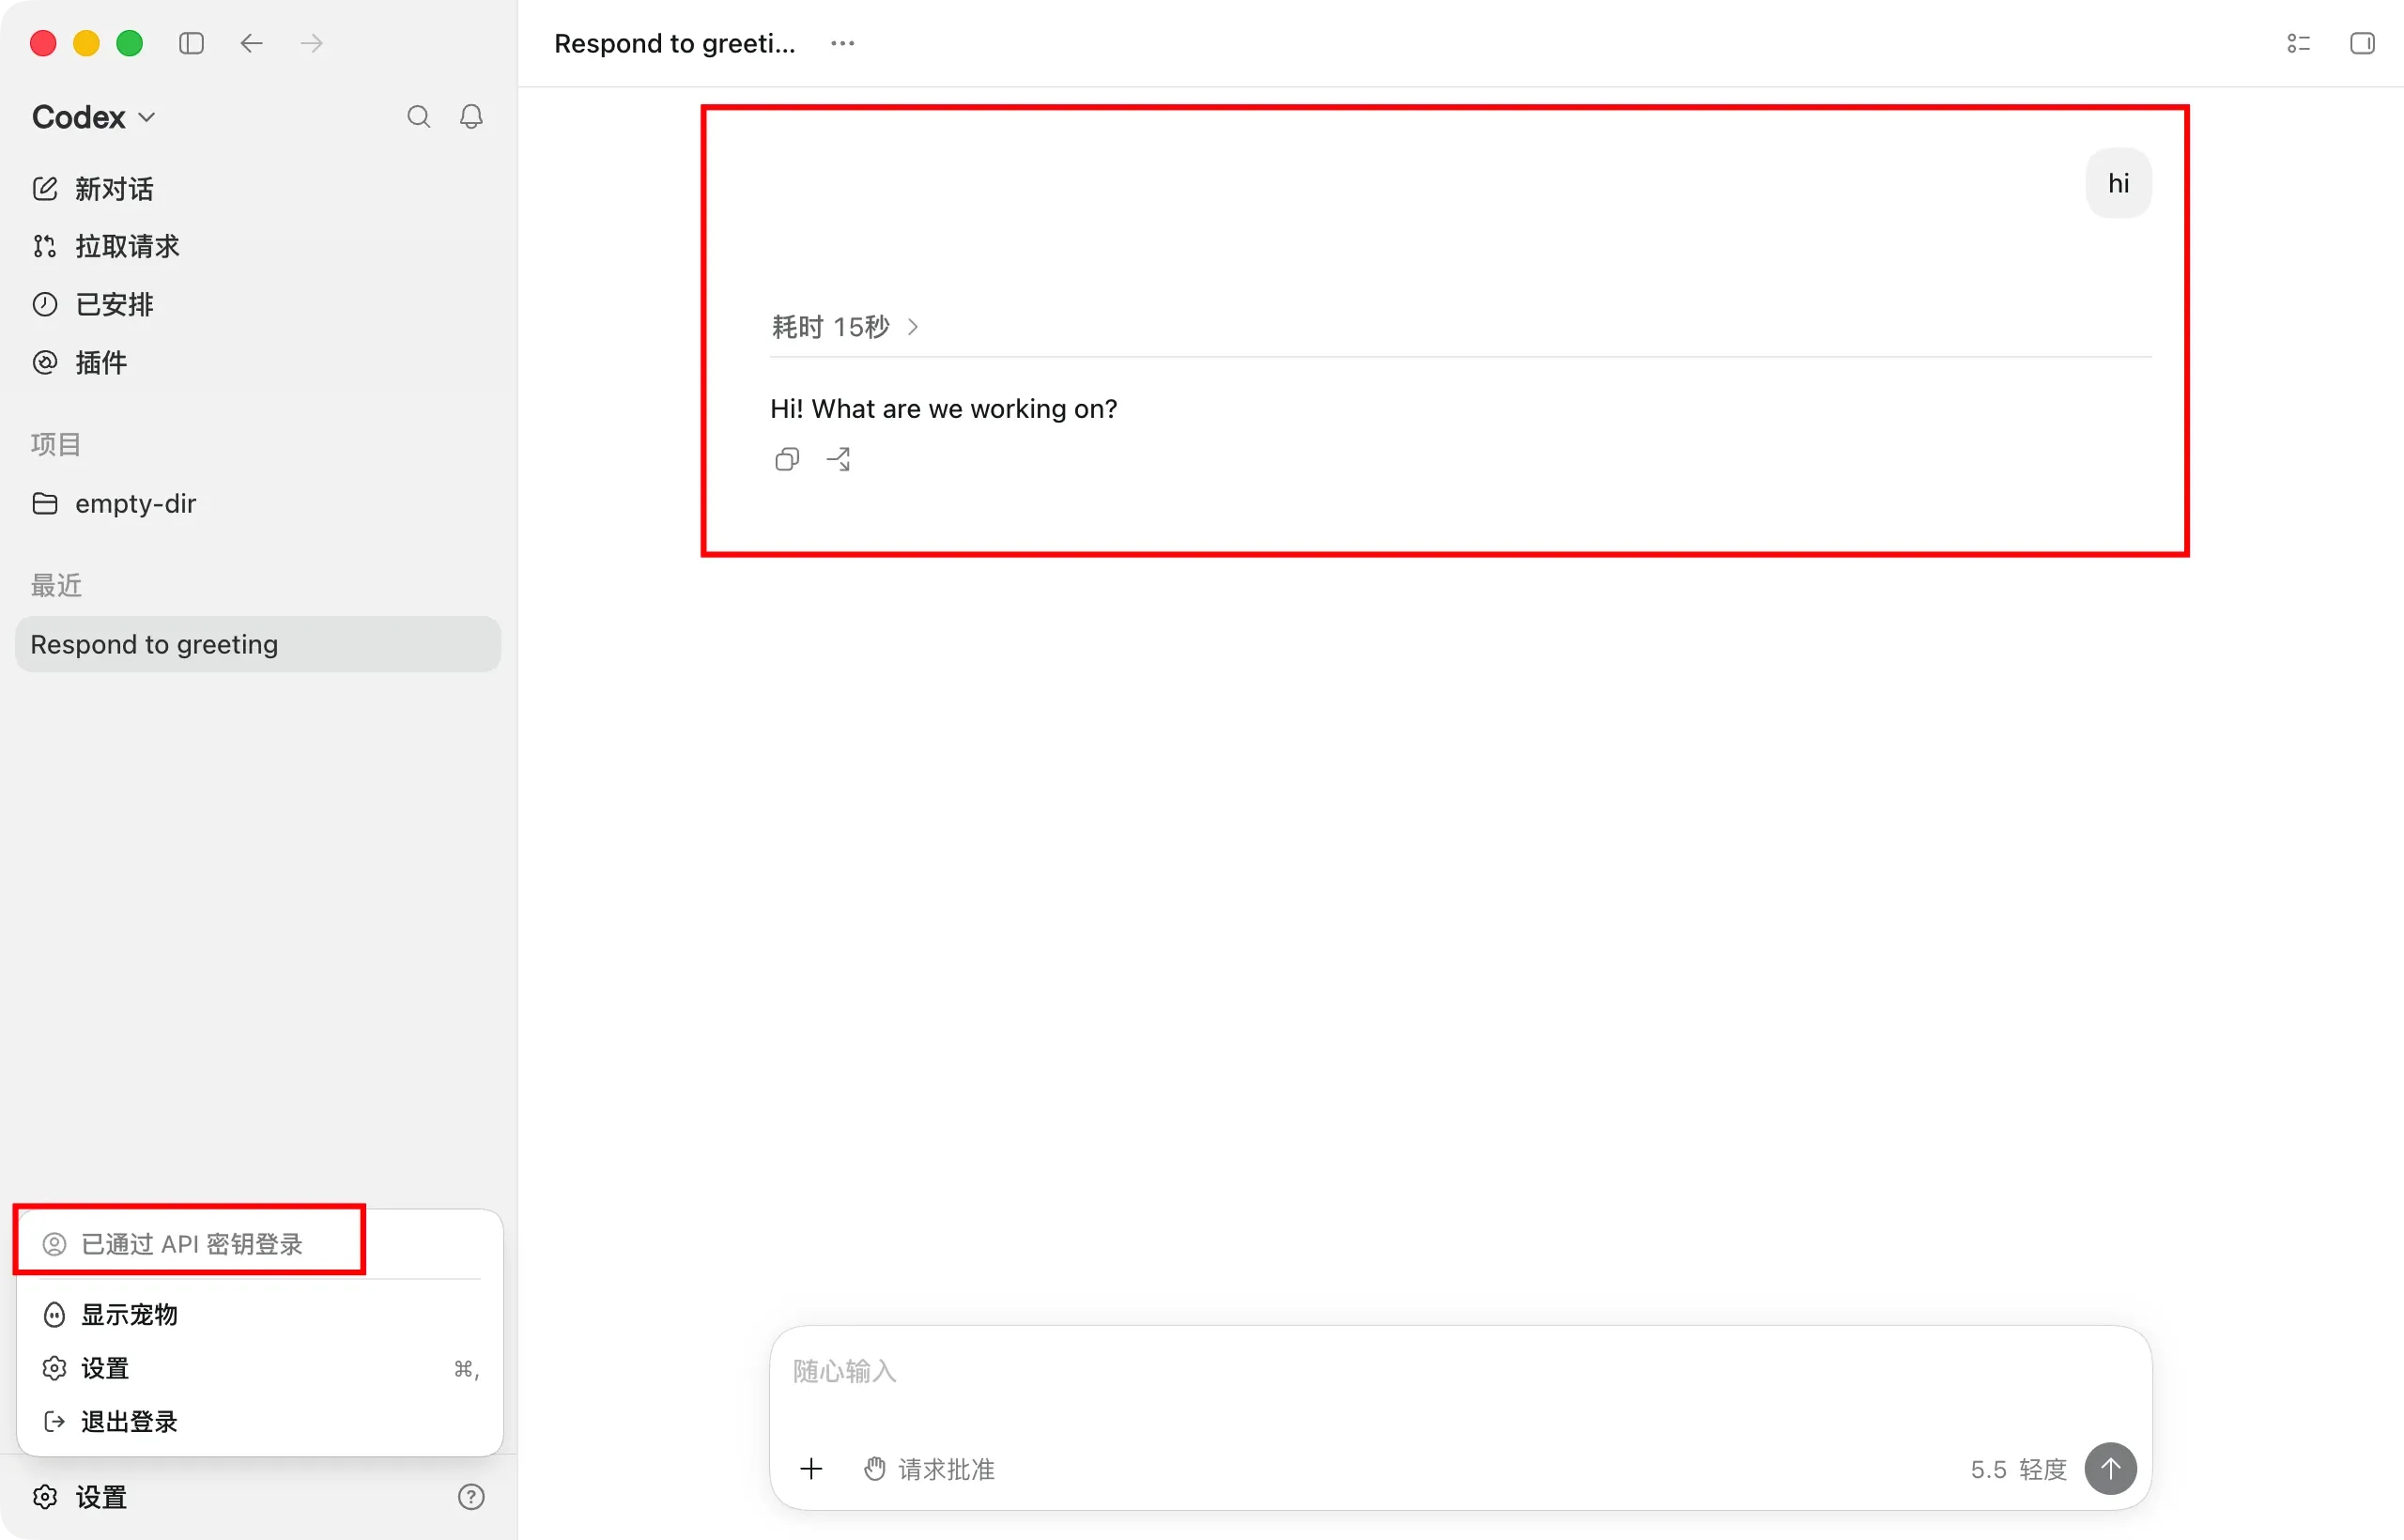
Open ChatGPT / Codex. In the left sidebar, you should see that you are signed in with an API Key. Send a message and confirm that it gets a response.
Note: After changing the configuration, existing sessions will continue to use the previous configuration. Start a new session for the changes to take effect.
Option 2: Import to ChatGPT / Codex with Cockpit Tools
If you have both a proxy service account and your own subscription account, Cockpit Tools is recommended for managing them.
1. Download and Install Cockpit Tools
Download and install Cockpit Tools.
2. Configure the API Key in Cockpit Tools
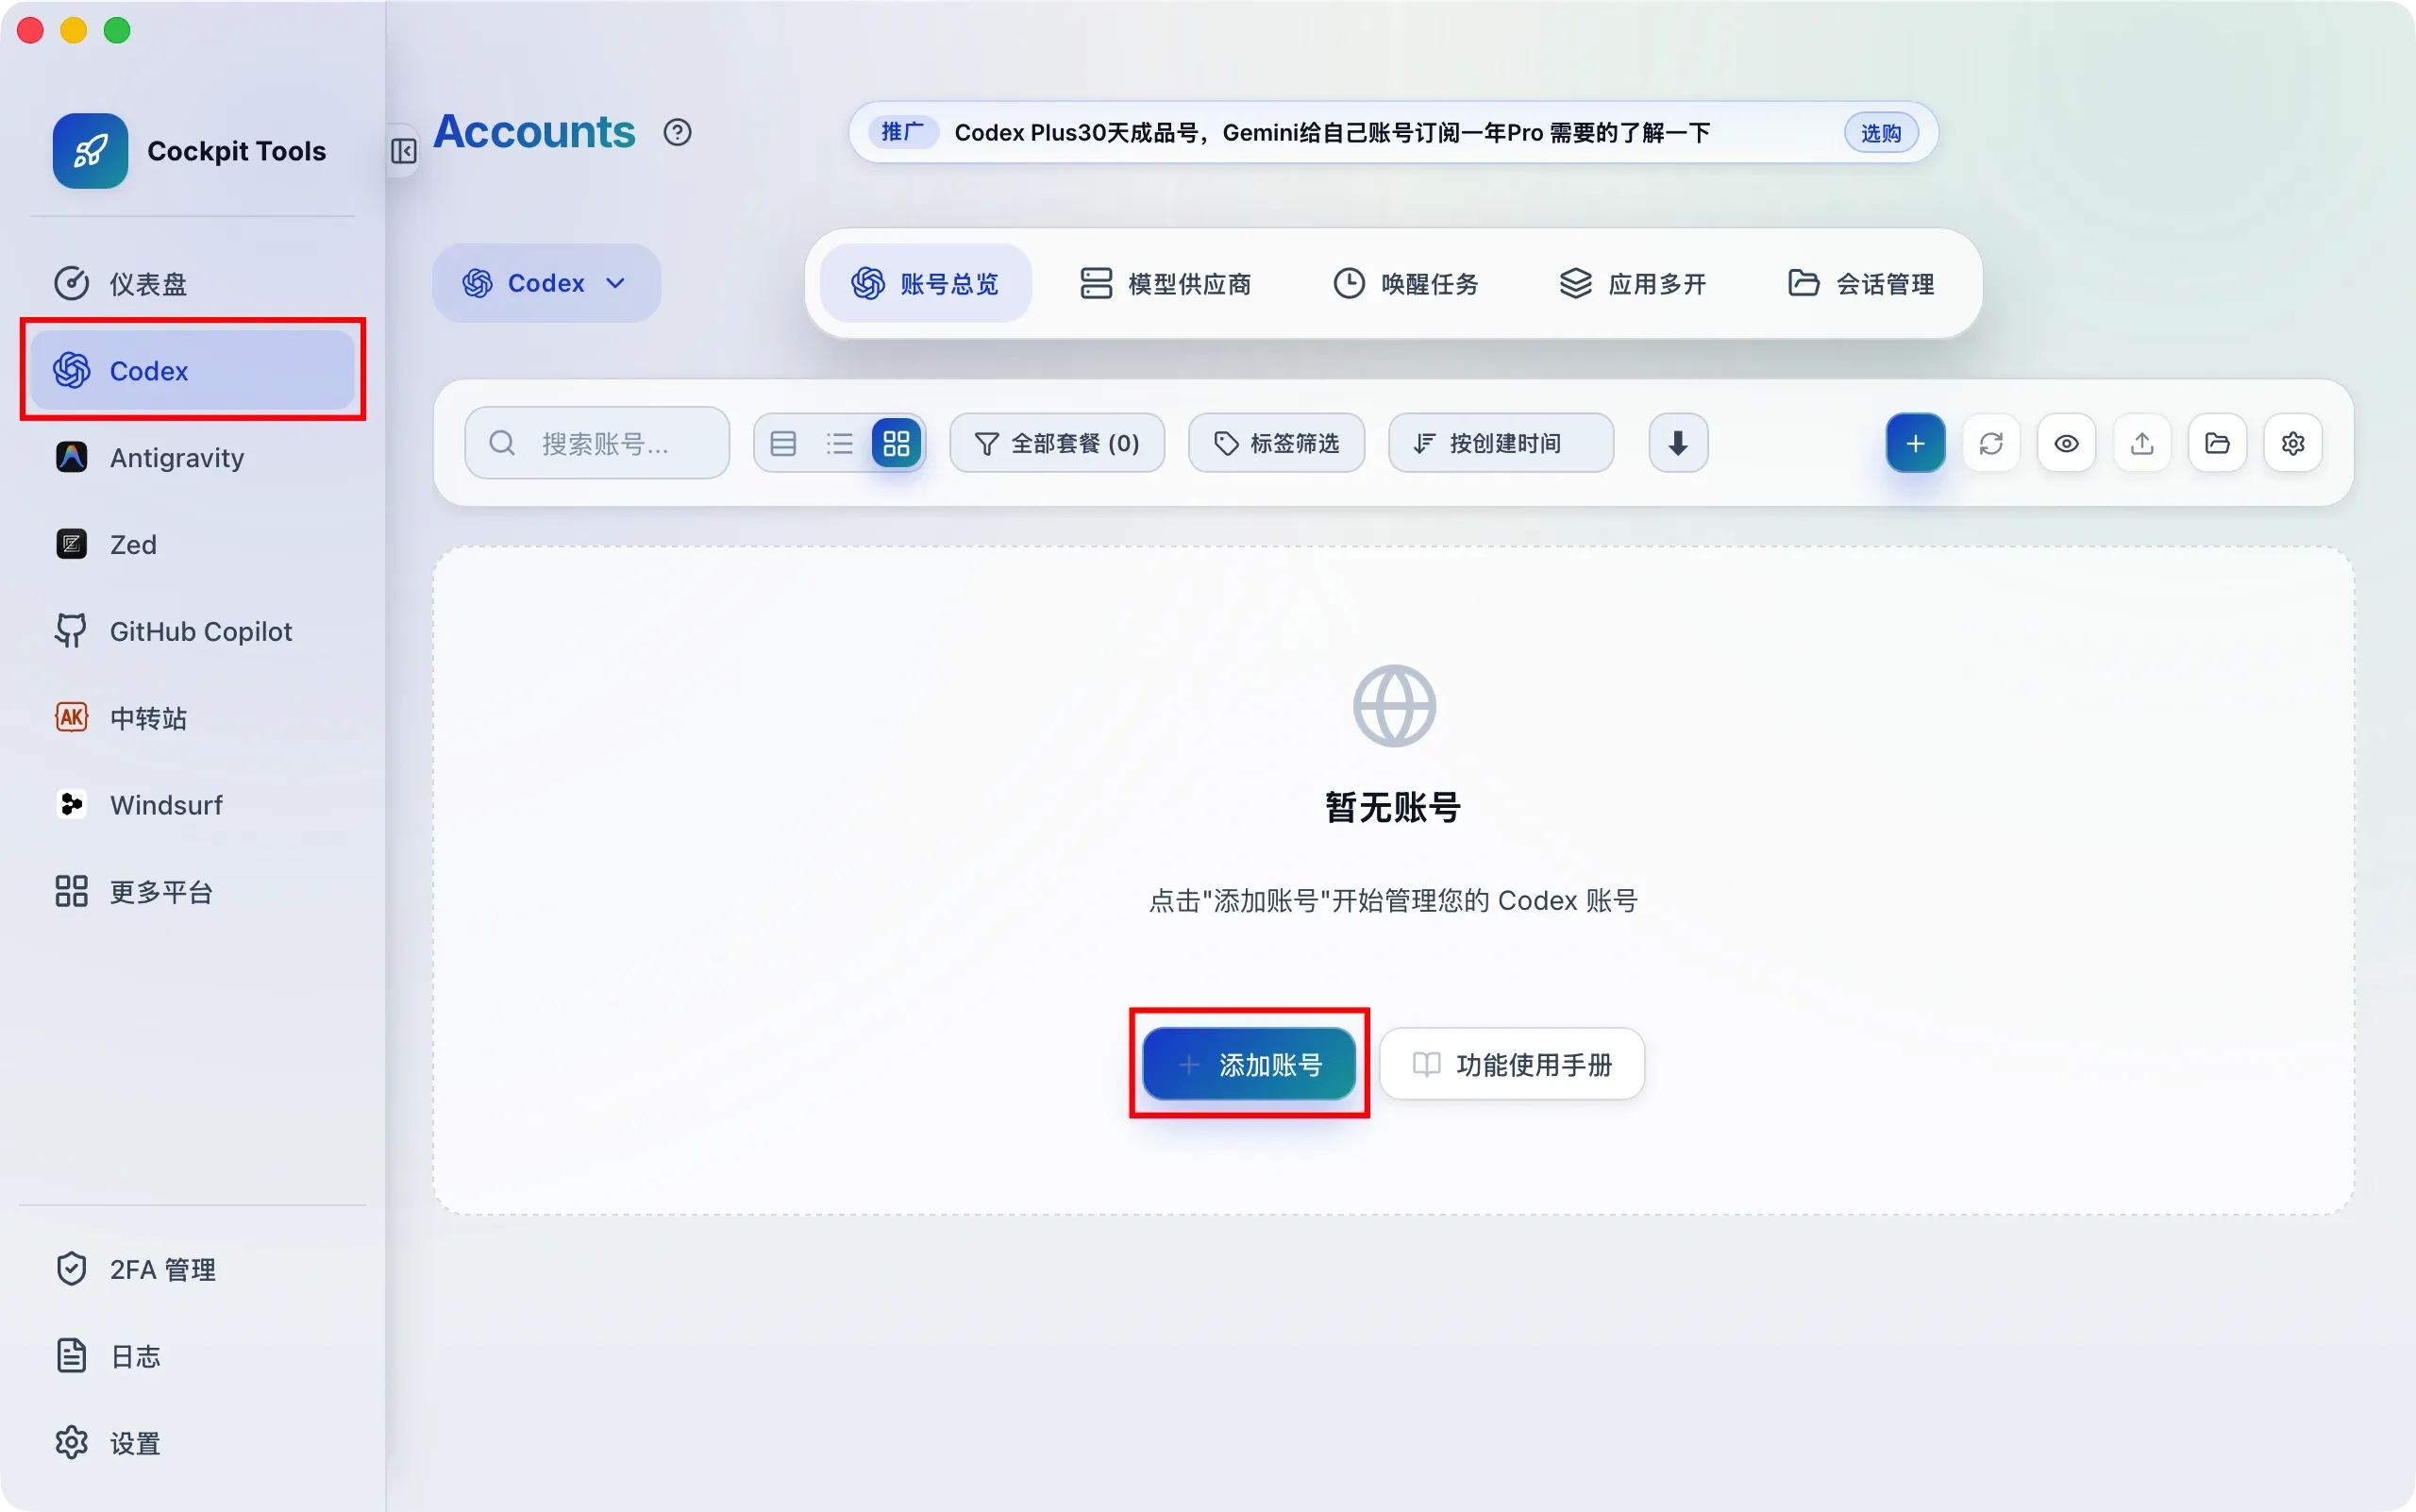
In the left sidebar of Cockpit Tools, choose Codex, then click add account.
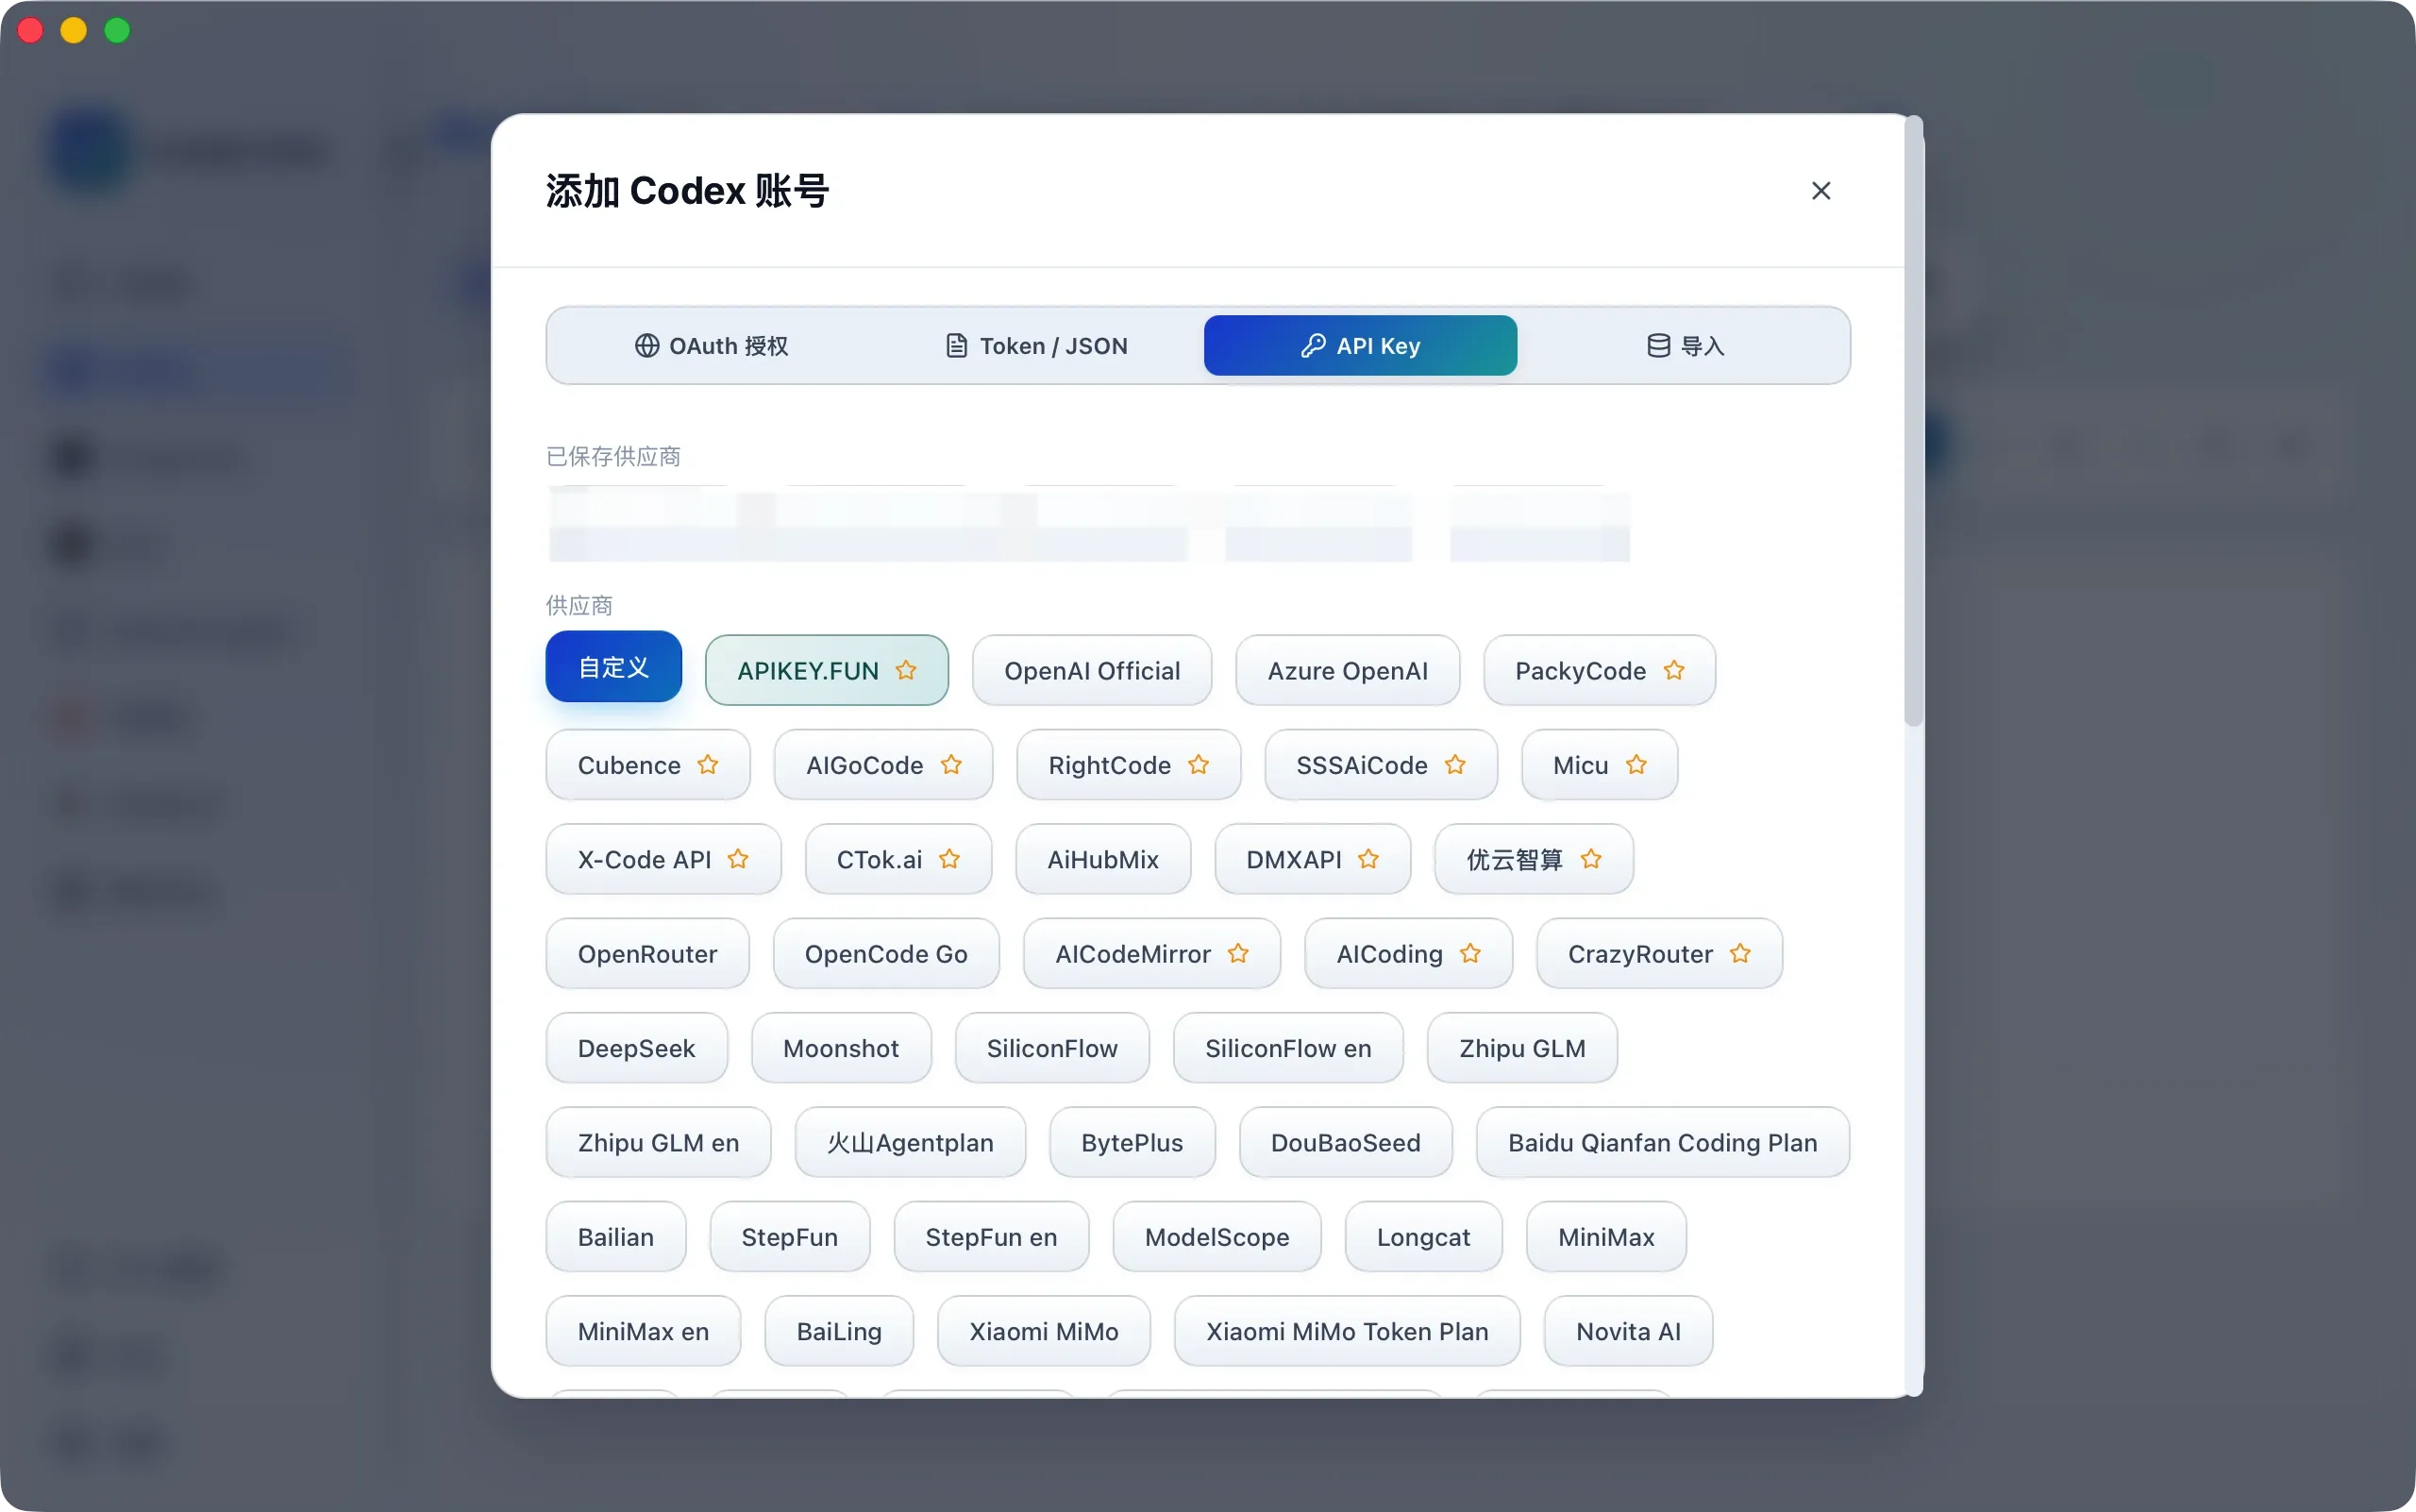
Choose API Key and custom configuration.
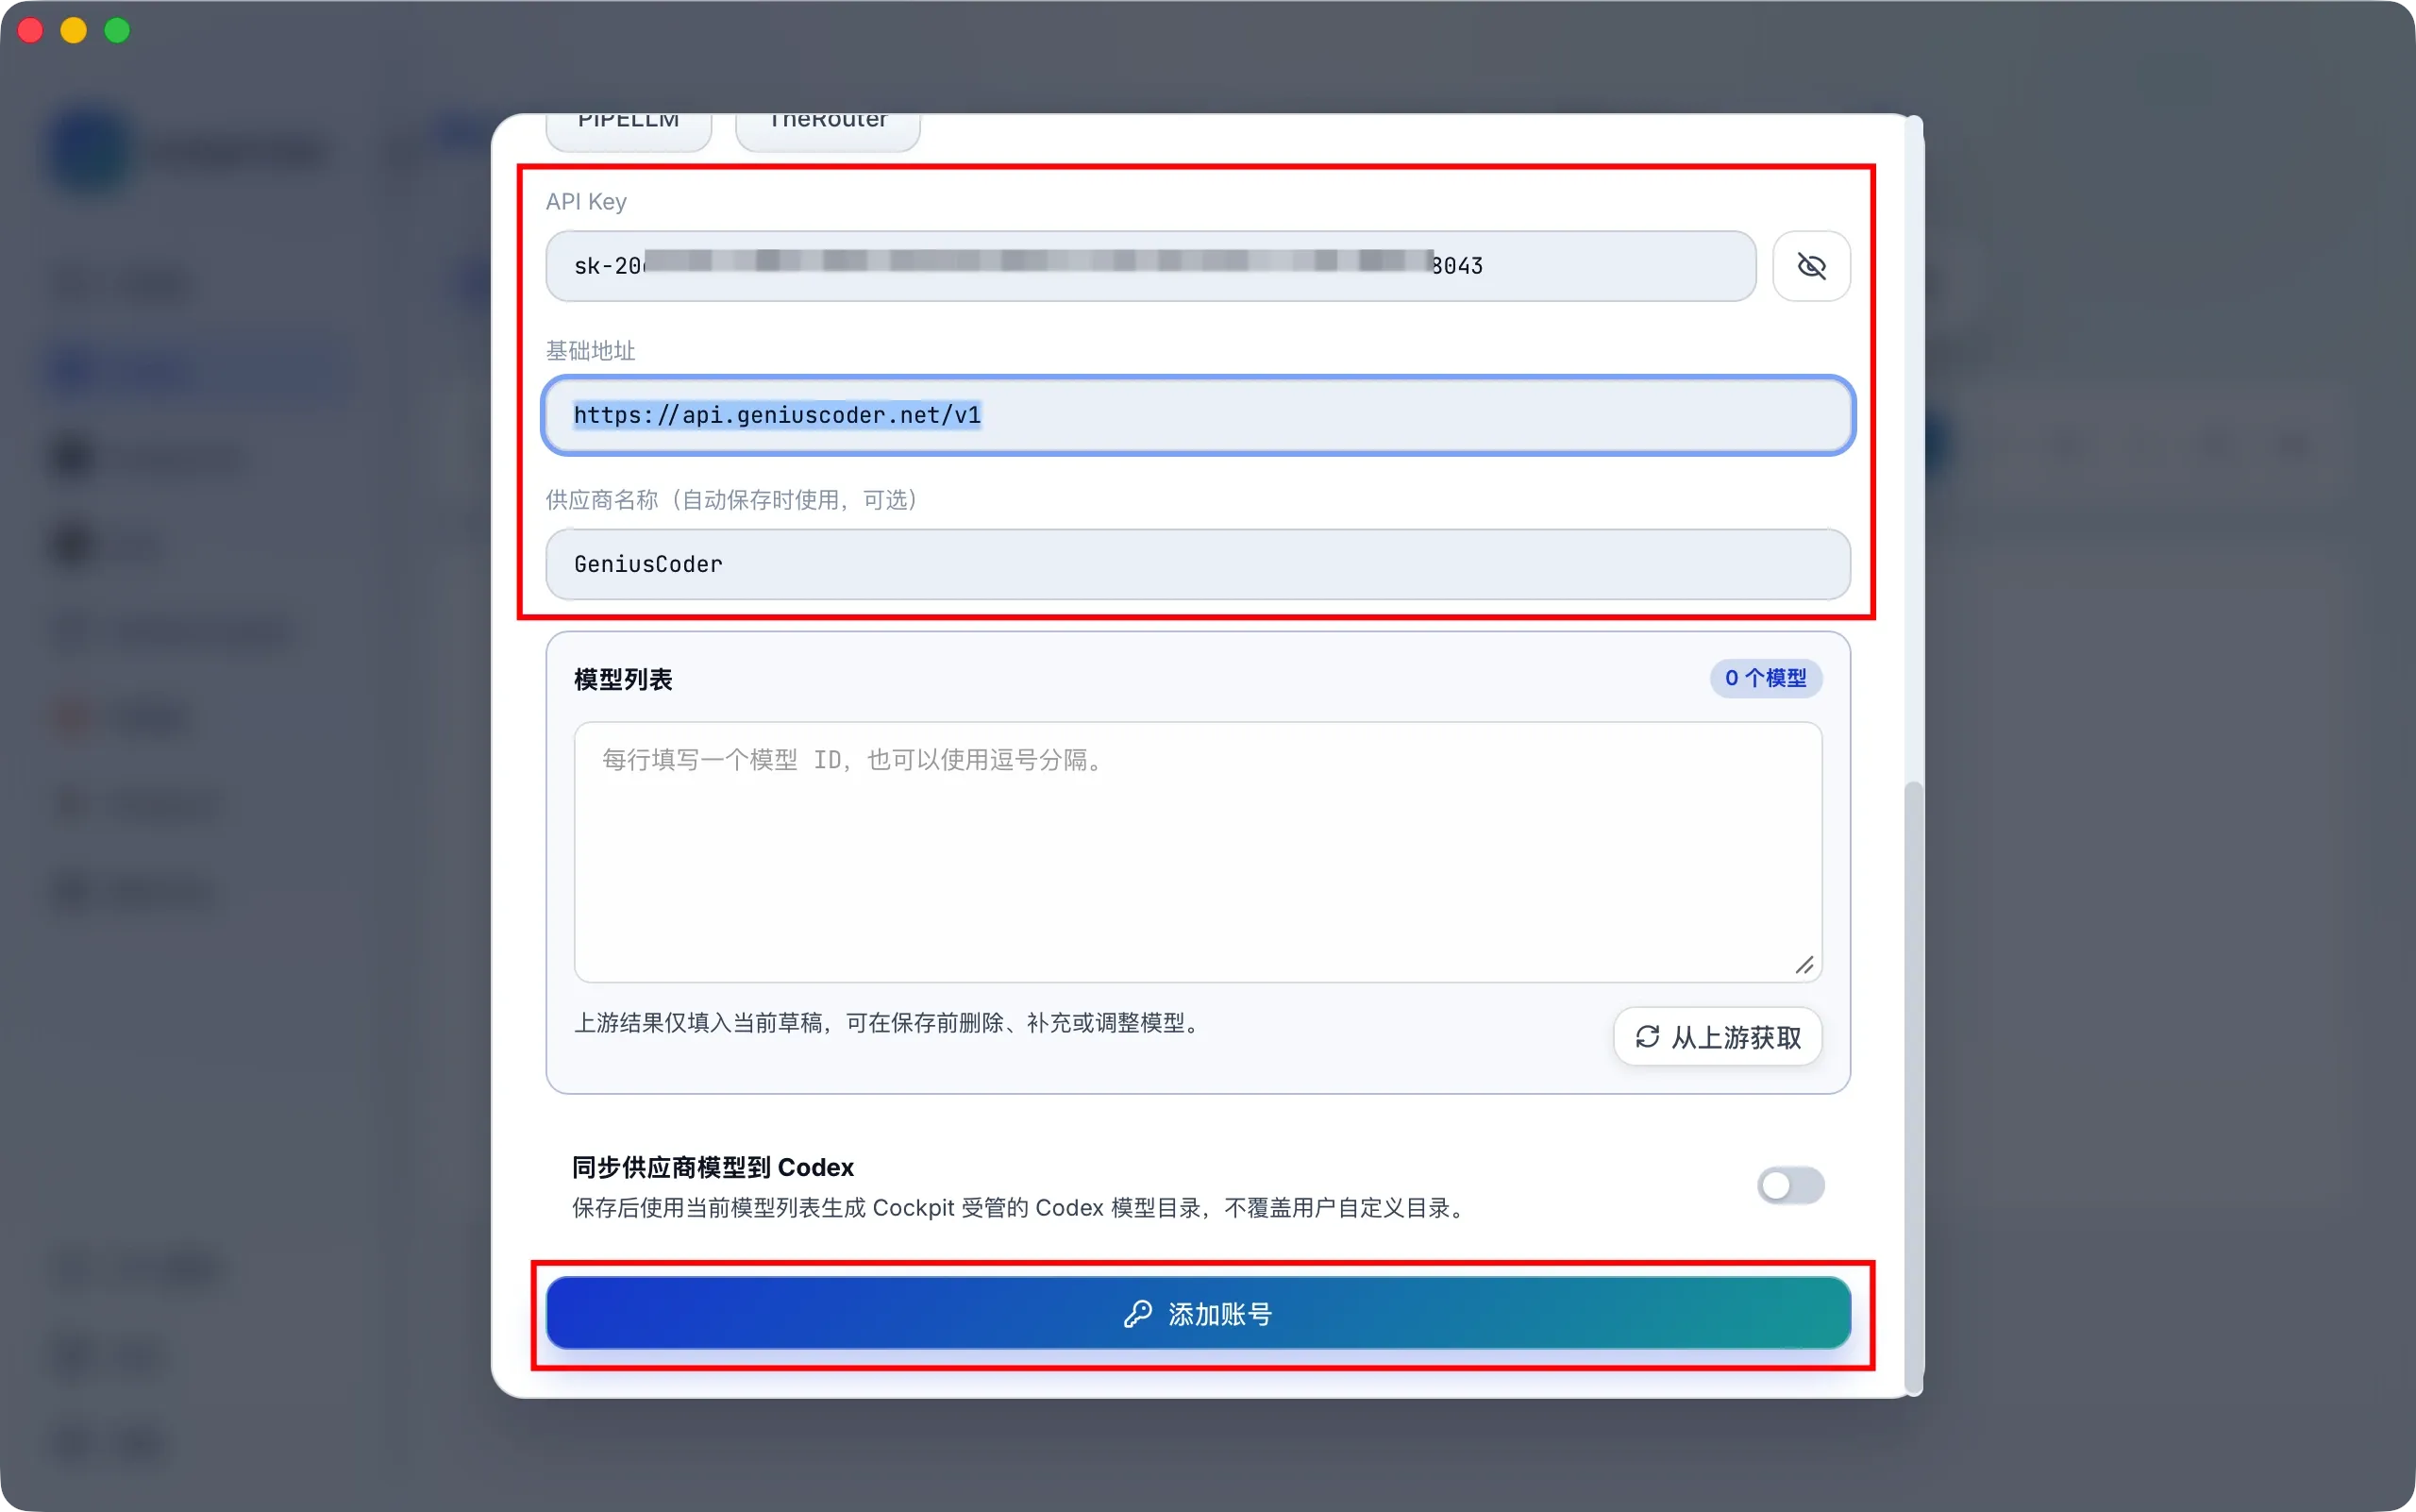
Scroll down, enter the information, then click add account.
- API Key is the API Key you created in the previous step
- Base URL is
https://api.geniuscoder.net/v1 - Provider name can be Genius Coder, or you can leave it empty
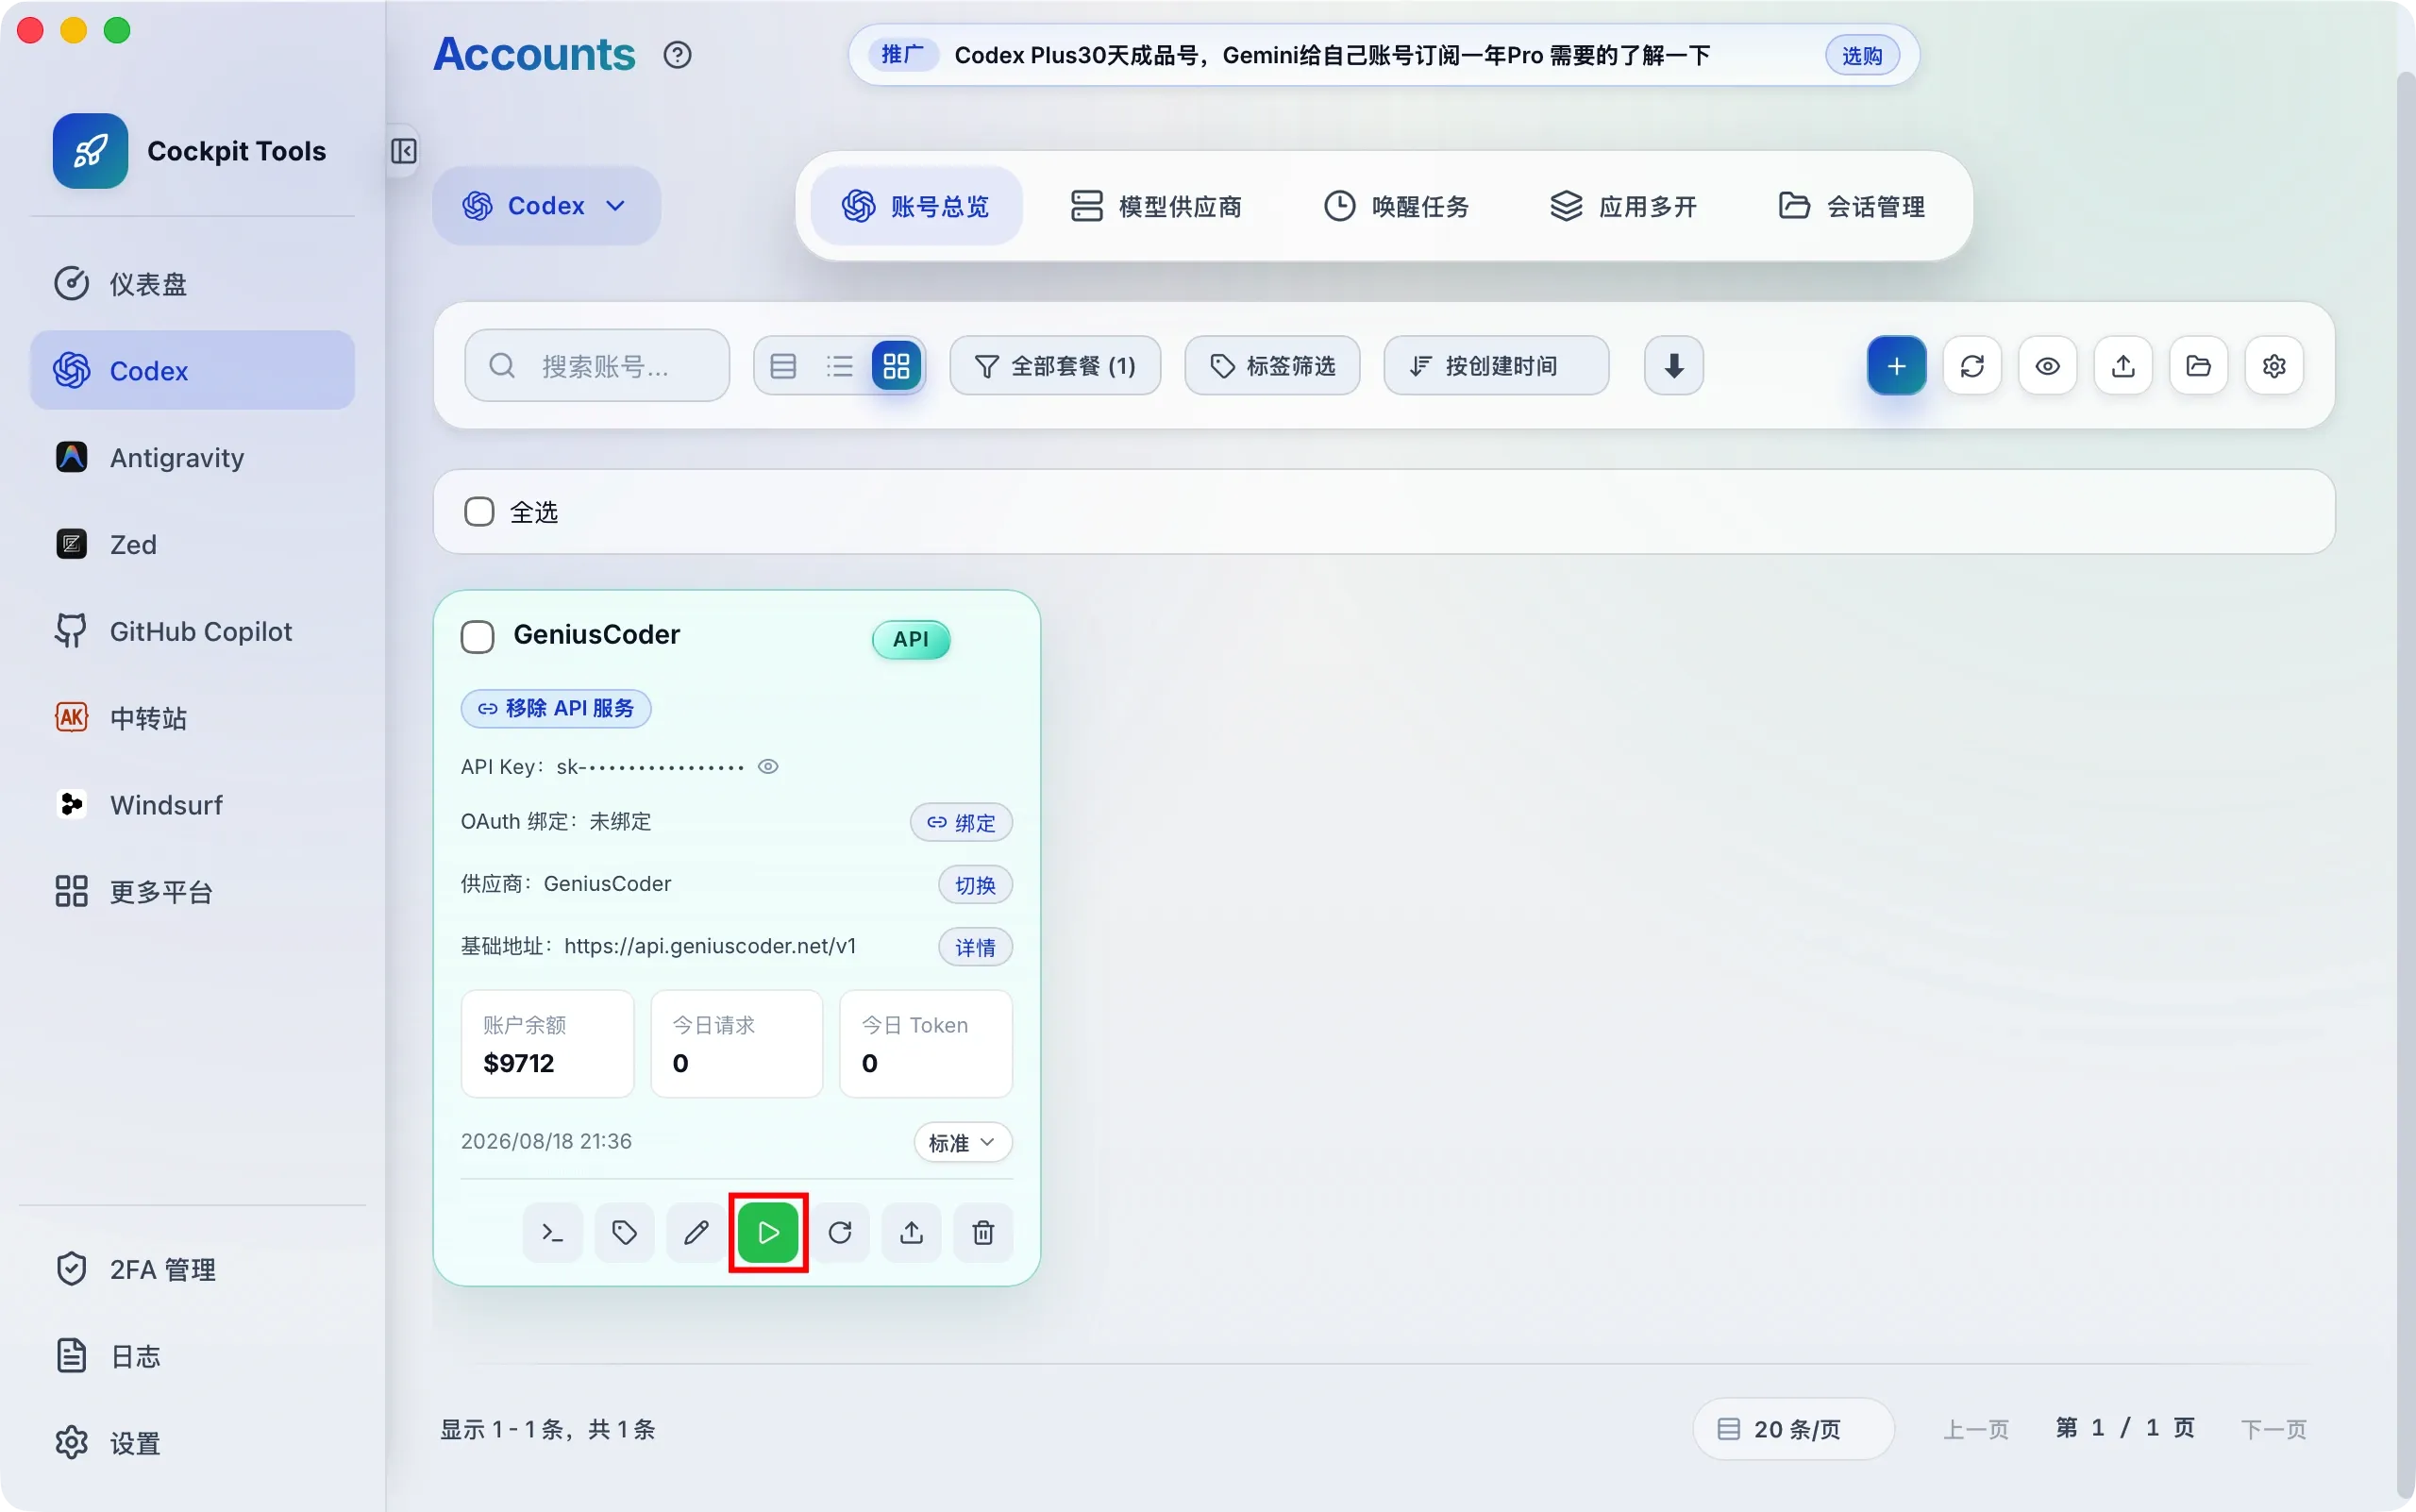
3. Import from Cockpit Tools to ChatGPT / Codex
Click the triangle button in the screenshot to enable this account. Cockpit Tools opens ChatGPT / Codex automatically by default. If it does not open, start it yourself.
In the Codex sidebar, you should see that you are signed in with an API Key. Send a message and confirm that it gets a response.
Note: After changing the configuration, existing sessions will continue to use the previous configuration. Start a new session for the changes to take effect.
Option 3: Manual Setup
Because ChatGPT / Codex changes frequently, third-party tools may lag behind and can occasionally fail to configure it.
If the first two methods did not work, or you do not want to install a third-party tool, try manual setup.
1. Start and Quit ChatGPT / Codex
Start ChatGPT / Codex at least once, then quit it. This creates the default configuration folder.
2. Find the Codex Configuration Folder
Find the Codex configuration folder .codex.
- Mac and Linux:
~/.codex/. On Mac, runopen ~/.codexin Terminal. On Ubuntu, runxdg-open ~/.codex. - Windows:
%USERPROFILE%\.codex, usuallyC:\Users\YourName\.codex\
3. Edit config.toml
Open .codex/config.toml and replace its contents with the following. Replace sk-xxx with your API Key.
# Use Genius Coder as the ChatGPT / Codex model provider
model_provider = "geniuscoder"

# Default model and reasoning effort
model = "gpt-5.6-sol"
model_reasoning_effort = "high"

# Connect to the Genius Coder API
[model_providers.geniuscoder]
name = "Genius Coder"
base_url = "https://api.geniuscoder.net/v1"
wire_api = "responses"
requires_openai_auth = true
experimental_bearer_token = "sk-xxx"
4. Edit auth.json
Open .codex/auth.json, clear its contents, and replace them with the following. Replace sk-xxx with your API Key.
{
  "auth_mode": "apikey",
  "OPENAI_API_KEY": "sk-xxx"
}
5. Verify the Setup
Save the files, restart ChatGPT / Codex, start a new session, and send a message to verify that the setup works.
Note: After changing the configuration, existing sessions will continue to use the previous configuration. Start a new session for the changes to take effect.